How to add more workspace around a slide in Keynote on Mac
by Sandy Writtenhouse
Keynote is an excellent tool for creating slideshows. Whether a business, educational, or even personal presentation, Keynote has great features to help you create the perfect slideshow.
So if you’re working on a presentation and find that you simply don’t have enough space, there is a remedy.
You can add more space on the canvas around a slide in Keynote. This lets you move around the area without feeling confined and limited. You can move objects out of the way until you need them or try out different ones for the right look.
Here’s how to add more workspace around a slide in Keynote on your Mac.
Expand your workspace in Keynote on Mac
To open up the canvas and give yourself more workspace around a slide, follow these steps.
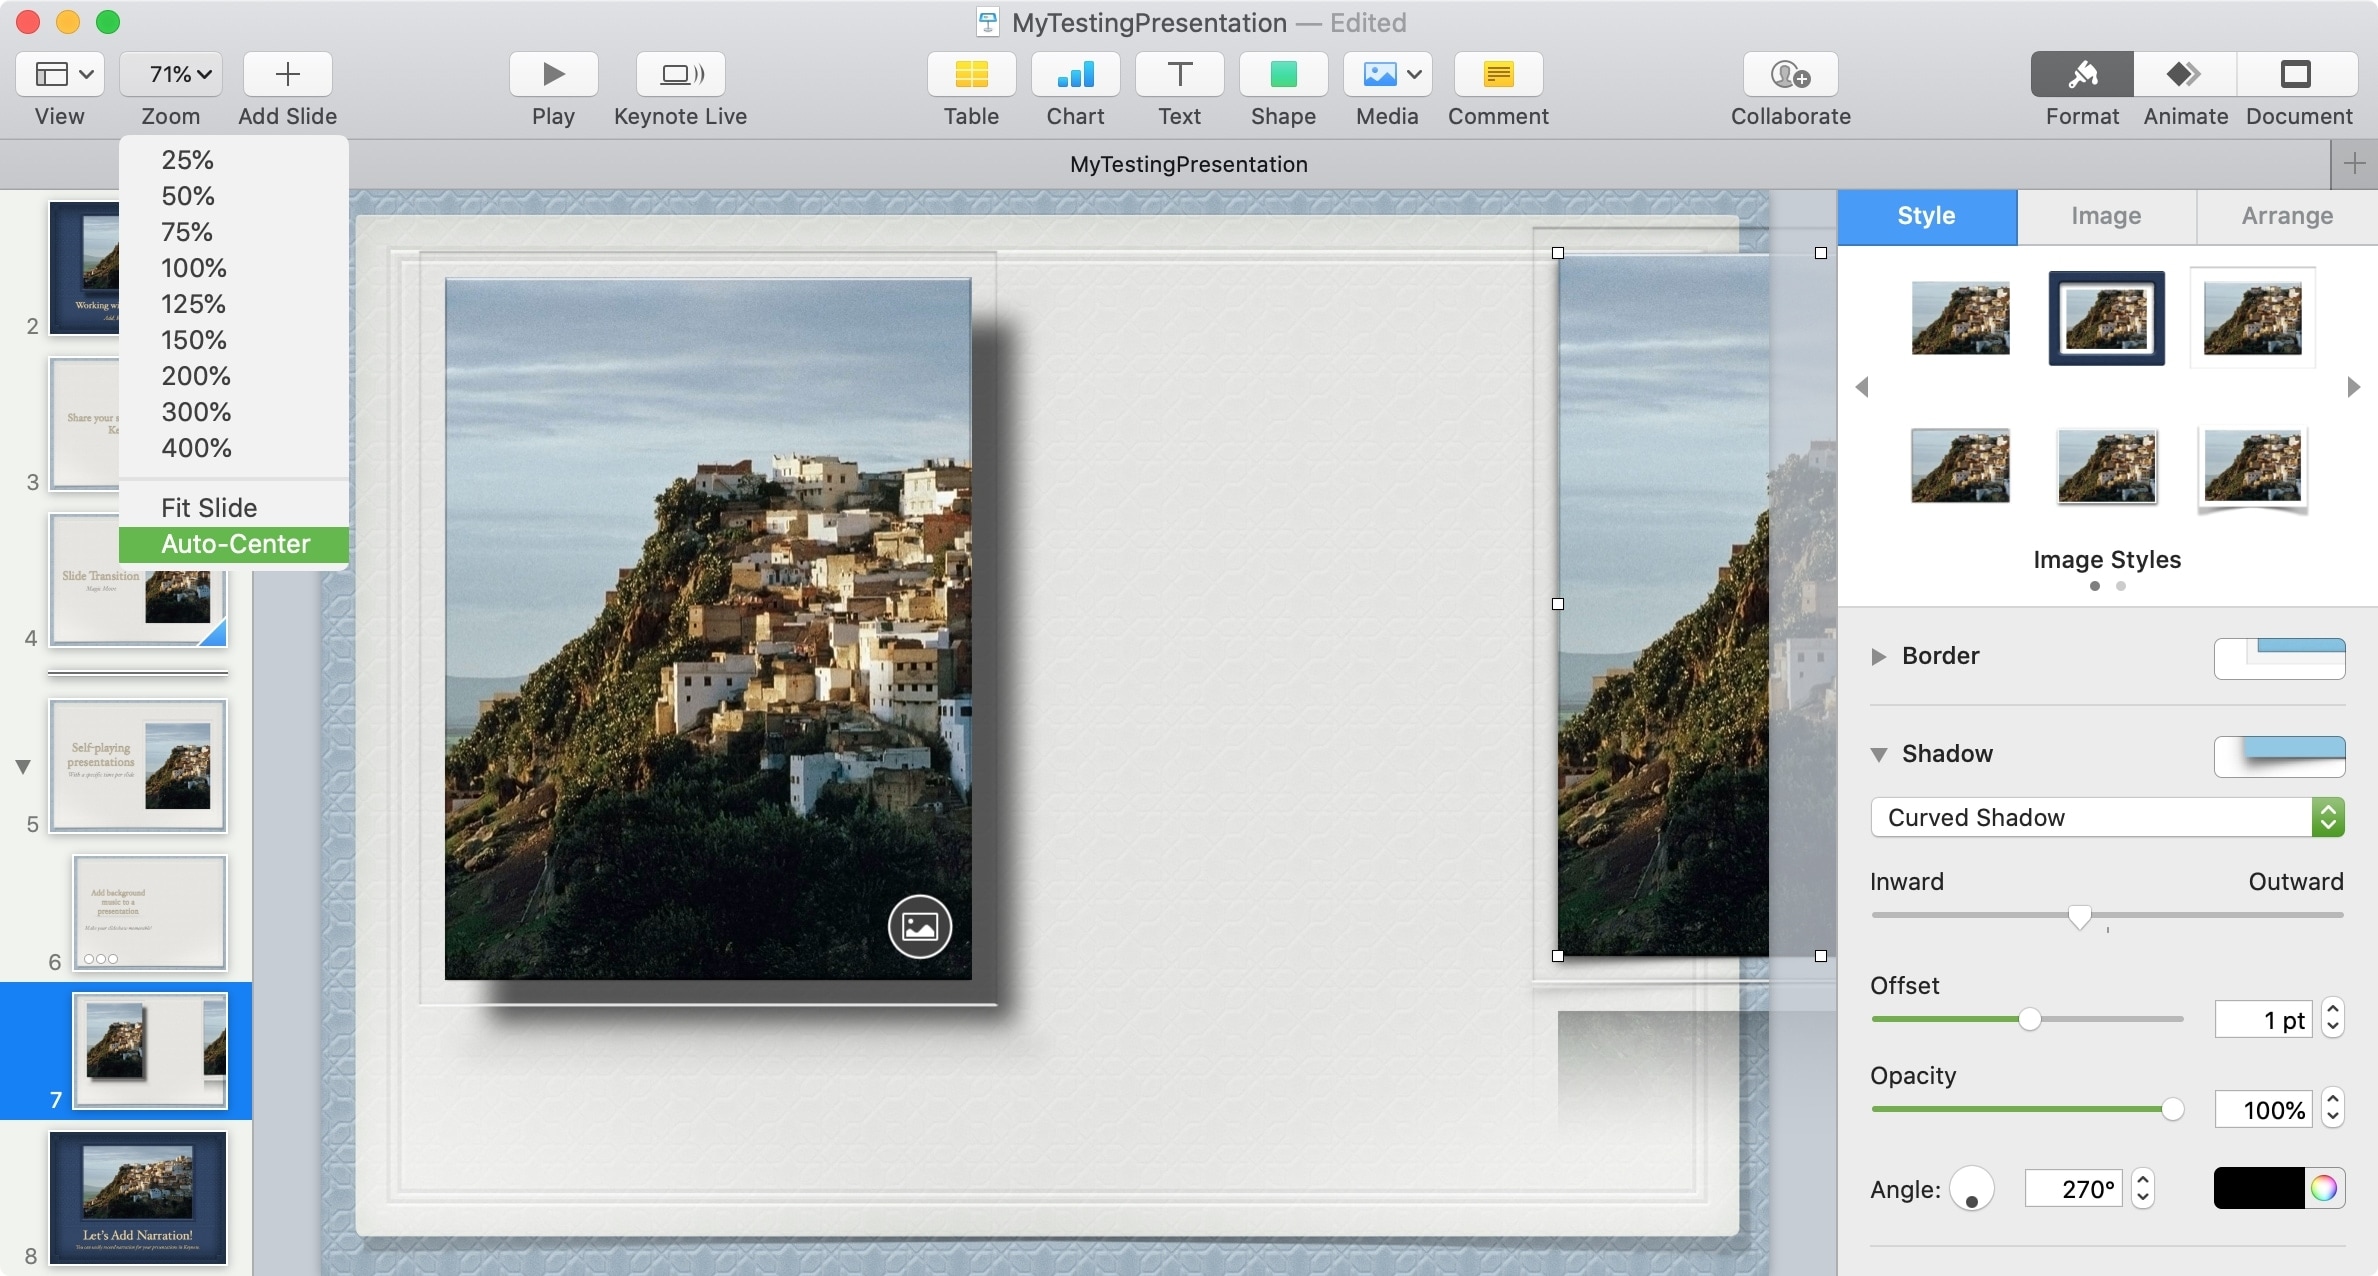
1) In the toolbar, click the Zoom button or in the menu bar, click View > Zoom. Then deselect Auto-Center.
Note: If you have Fit Slide selected in that same menu, you’ll need to deselect it first and then you can deselect Auto-Center.
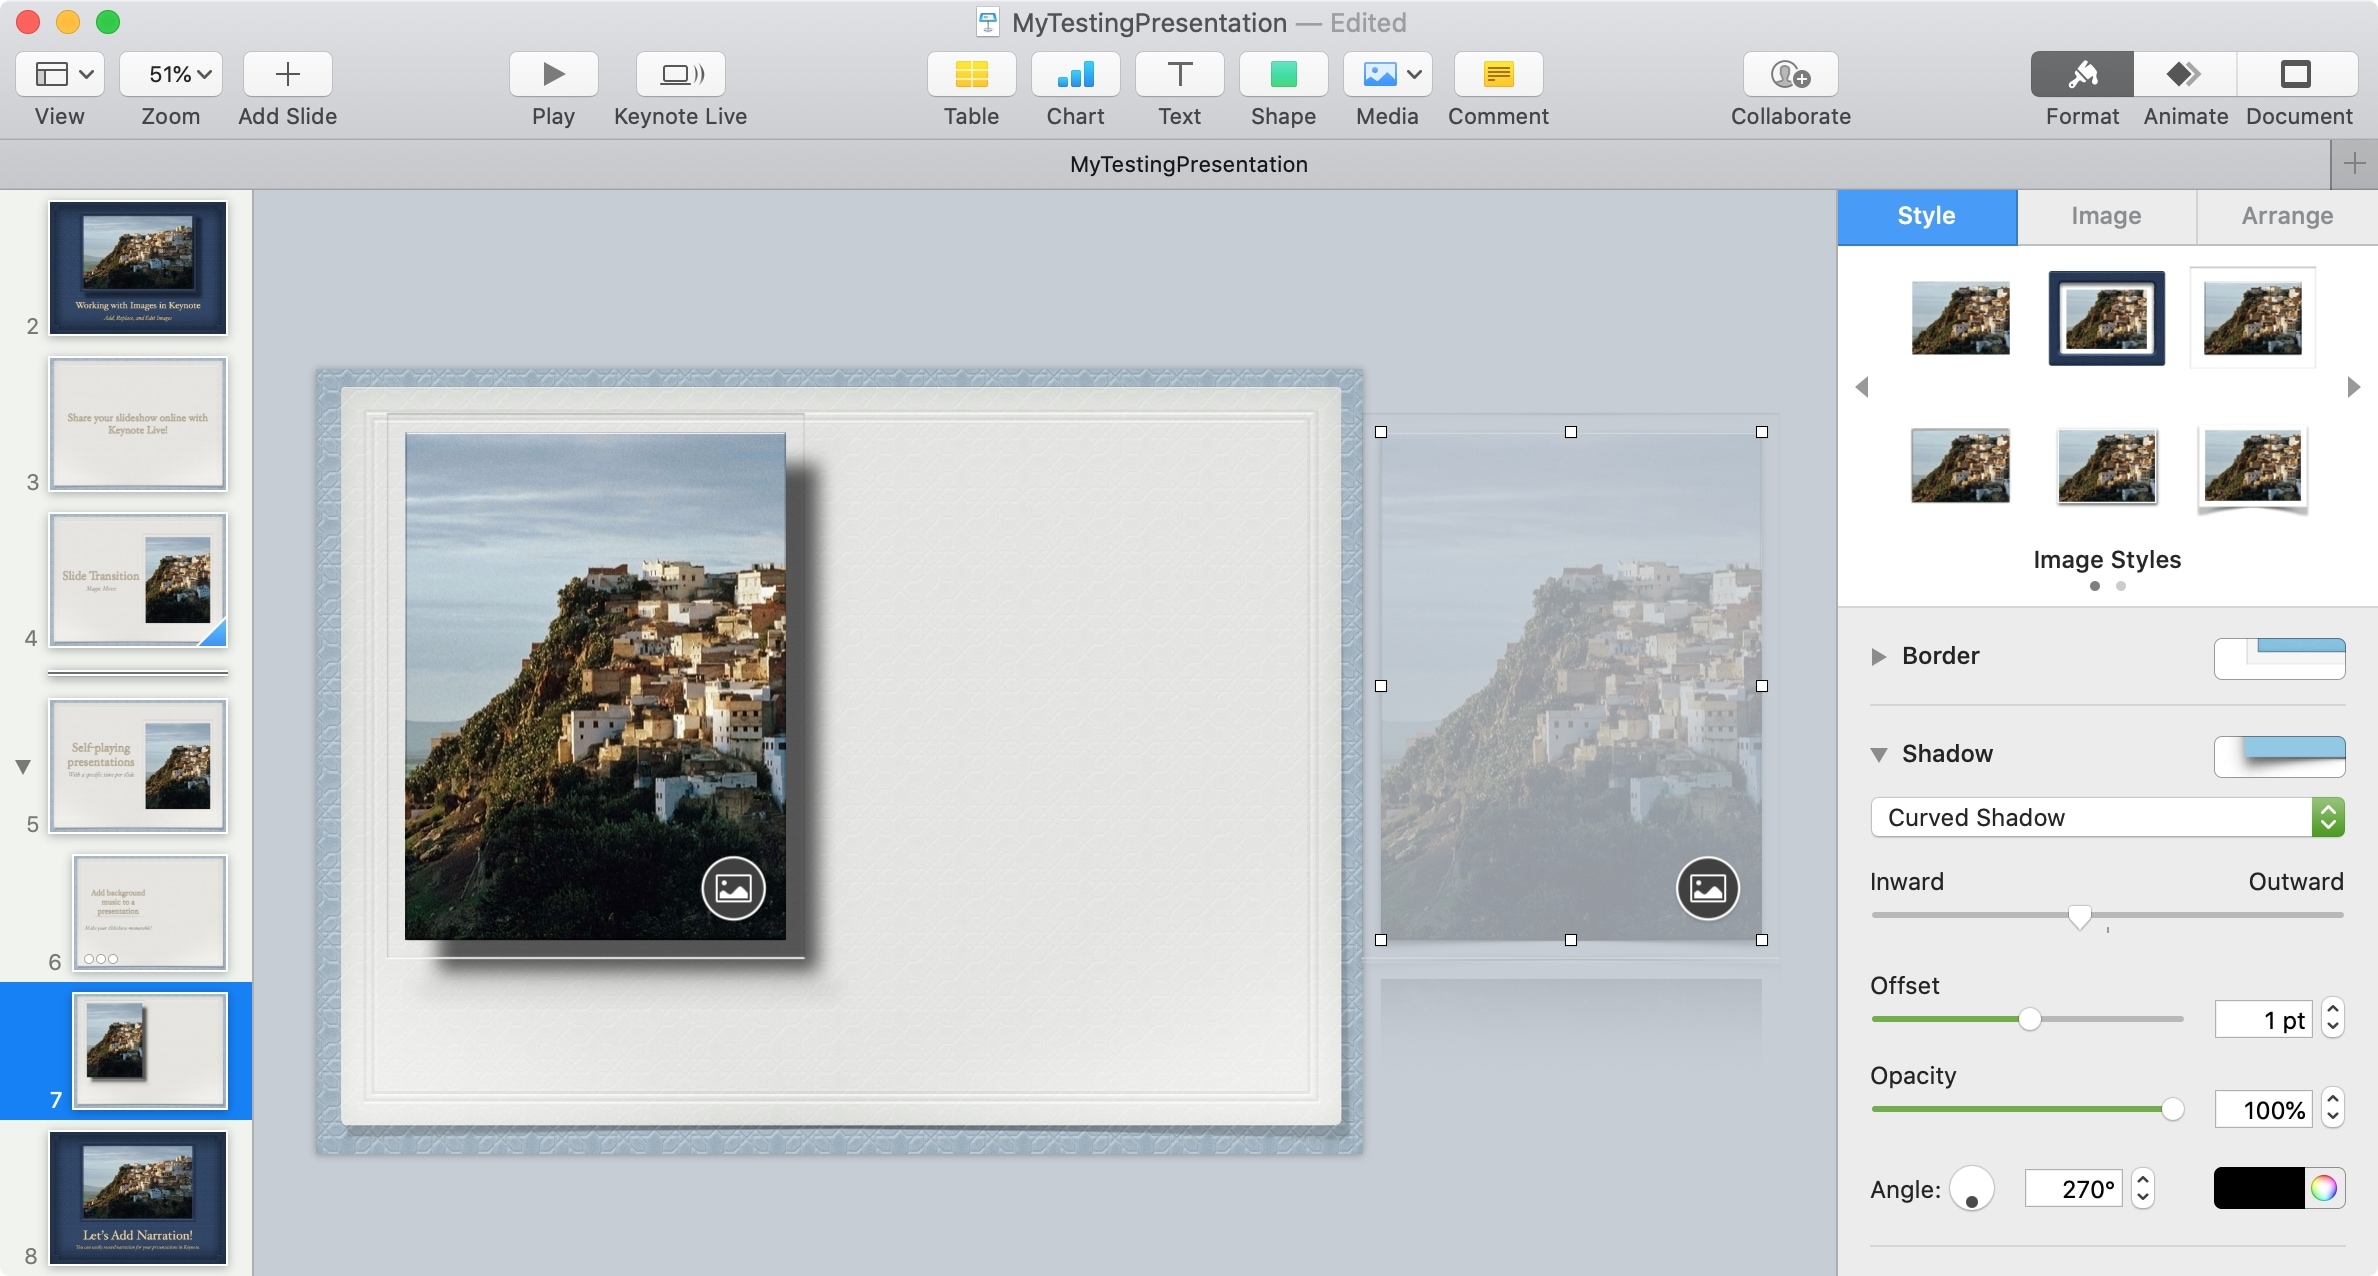
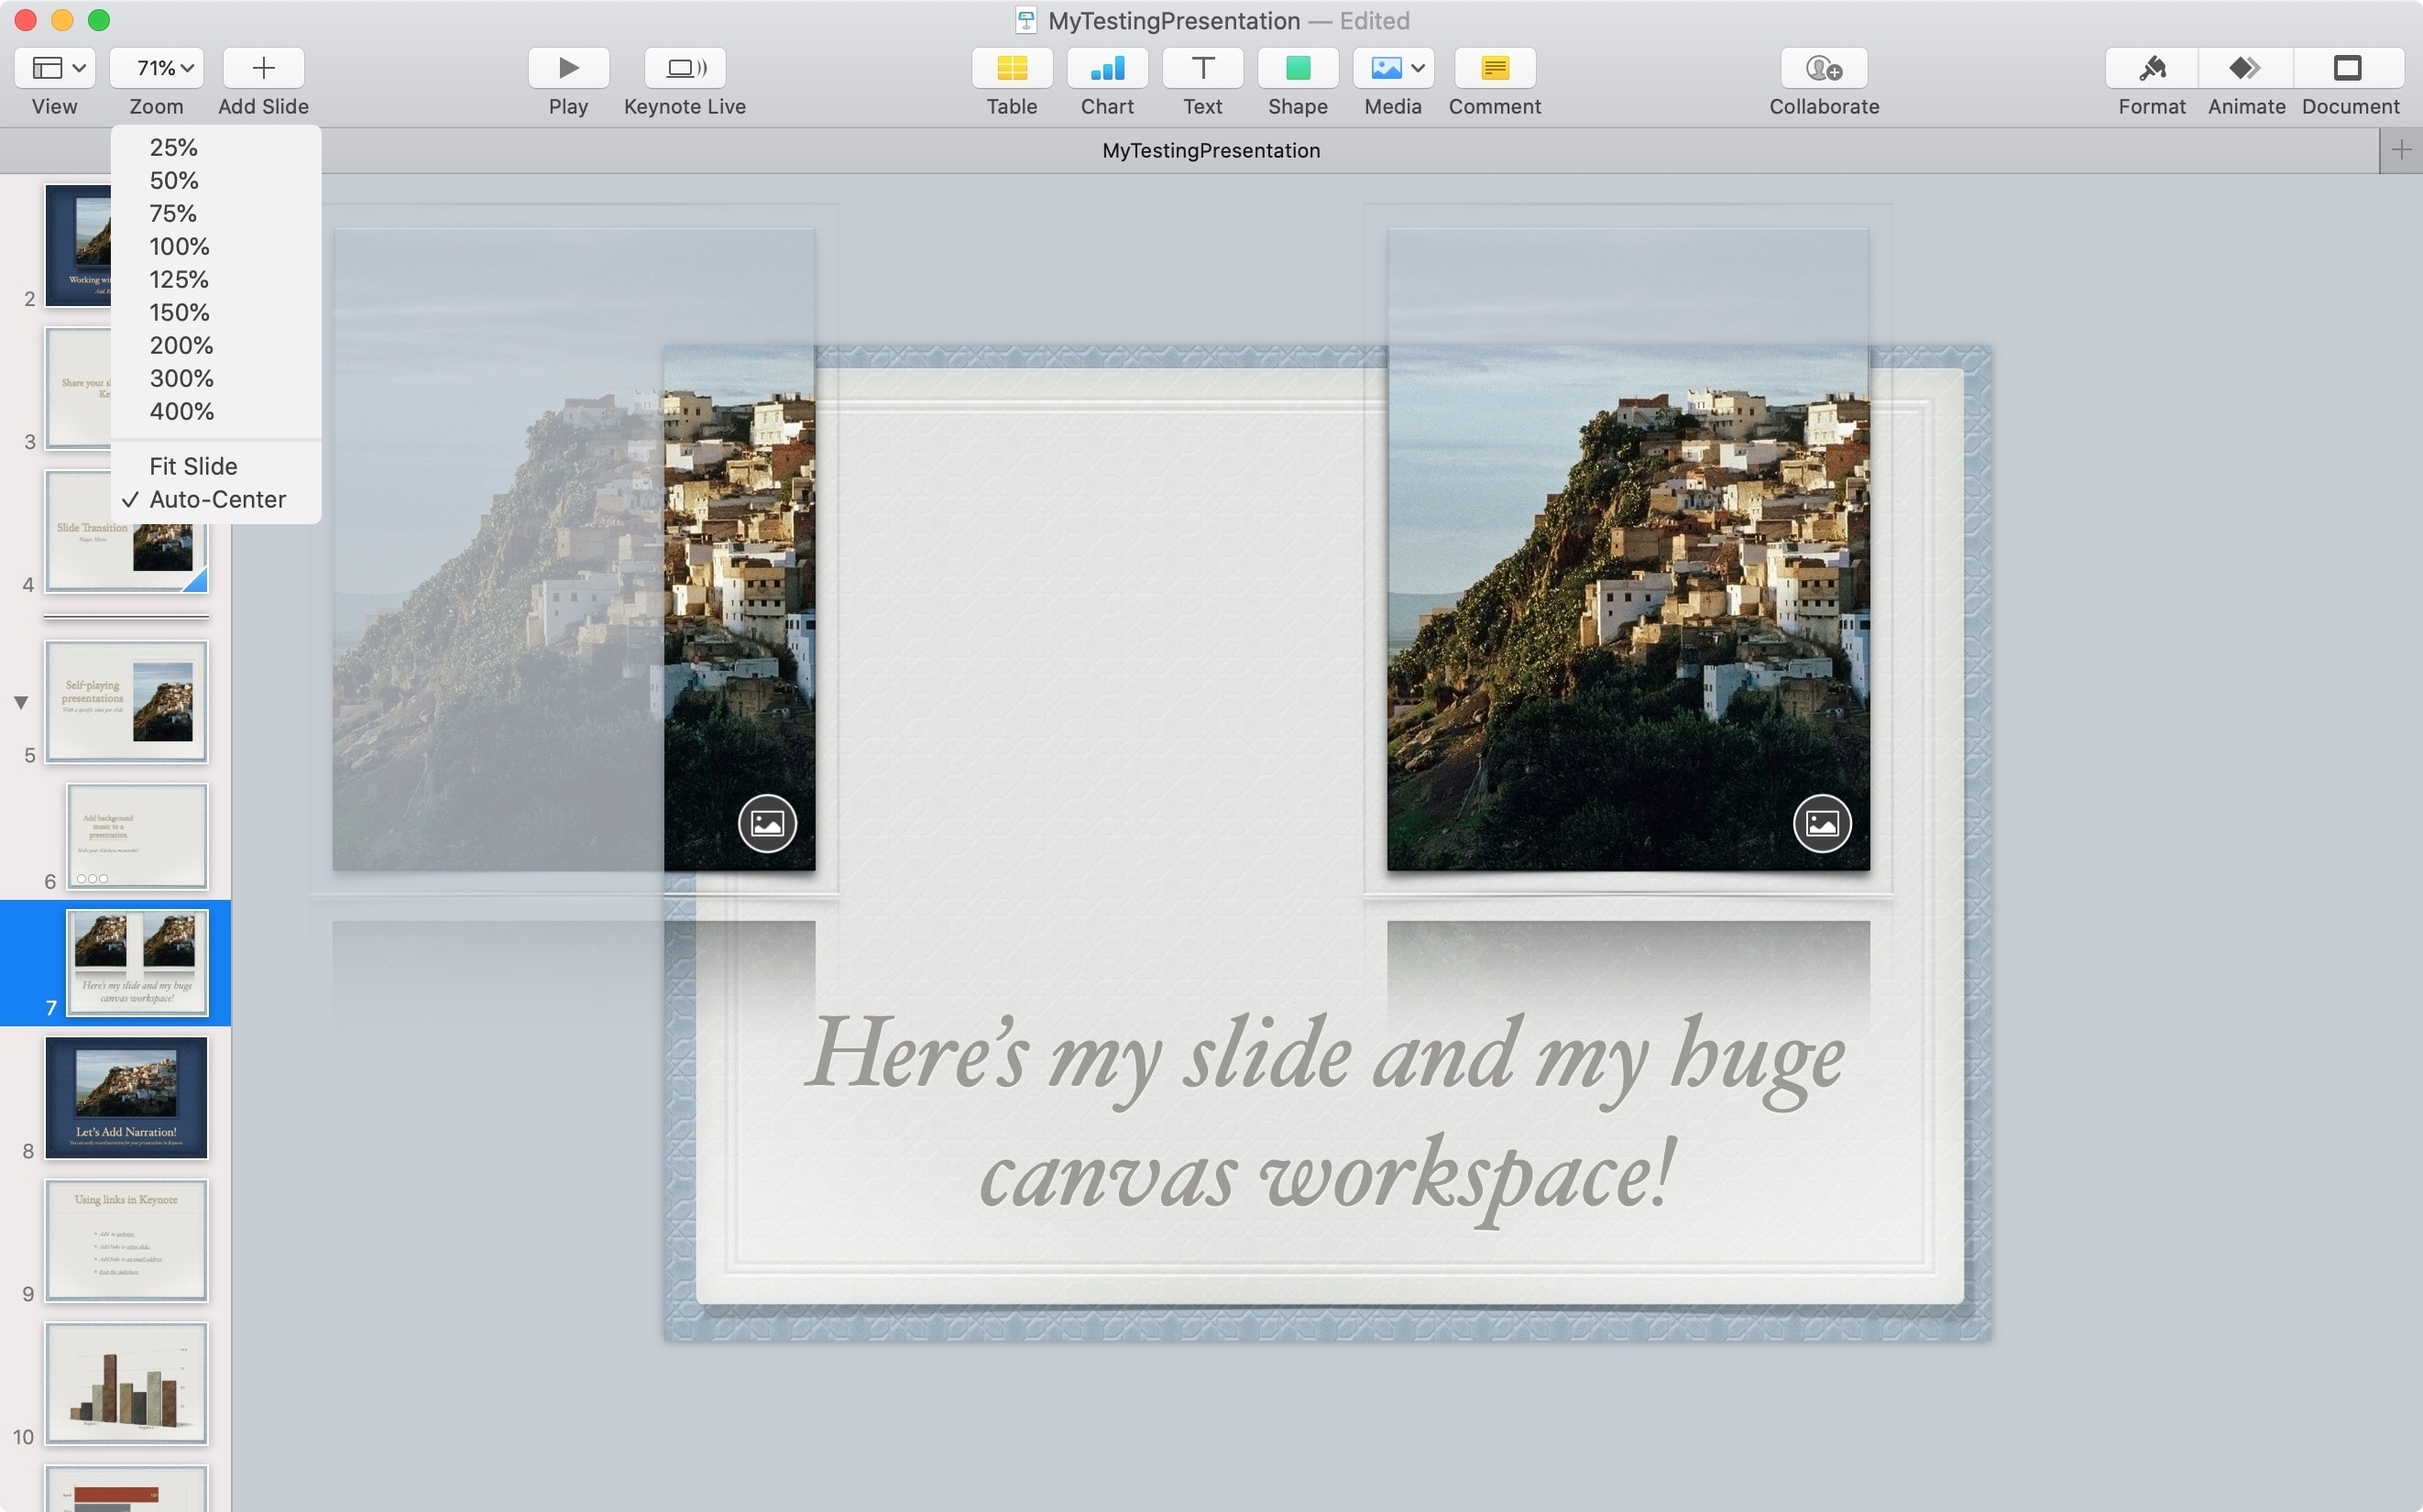
2) Click an object on your slide and then drag it outside of the slide. You’ll see the canvas expand as you drag the object. You can drag that object anywhere outside of the slide you like to make the workspace as large as you need.

You can then scroll around the canvas or hold the Space Key to drag and pan the area, like the Maps app.
If you want to see all of the content in the workspace, click View > Zoom > Zoom to Fit Content from the menu bar. This will show you the entire canvas for that slide area.

Exit the expanded workspace
If you’re finished using that expanded canvas, you can go right back to the original view by clicking the Zoom button in the toolbar or View > Zoom in the menu bar. Then select Auto-Center.

Once you exit the expanded workspace, you can still work with objects that are out of view.
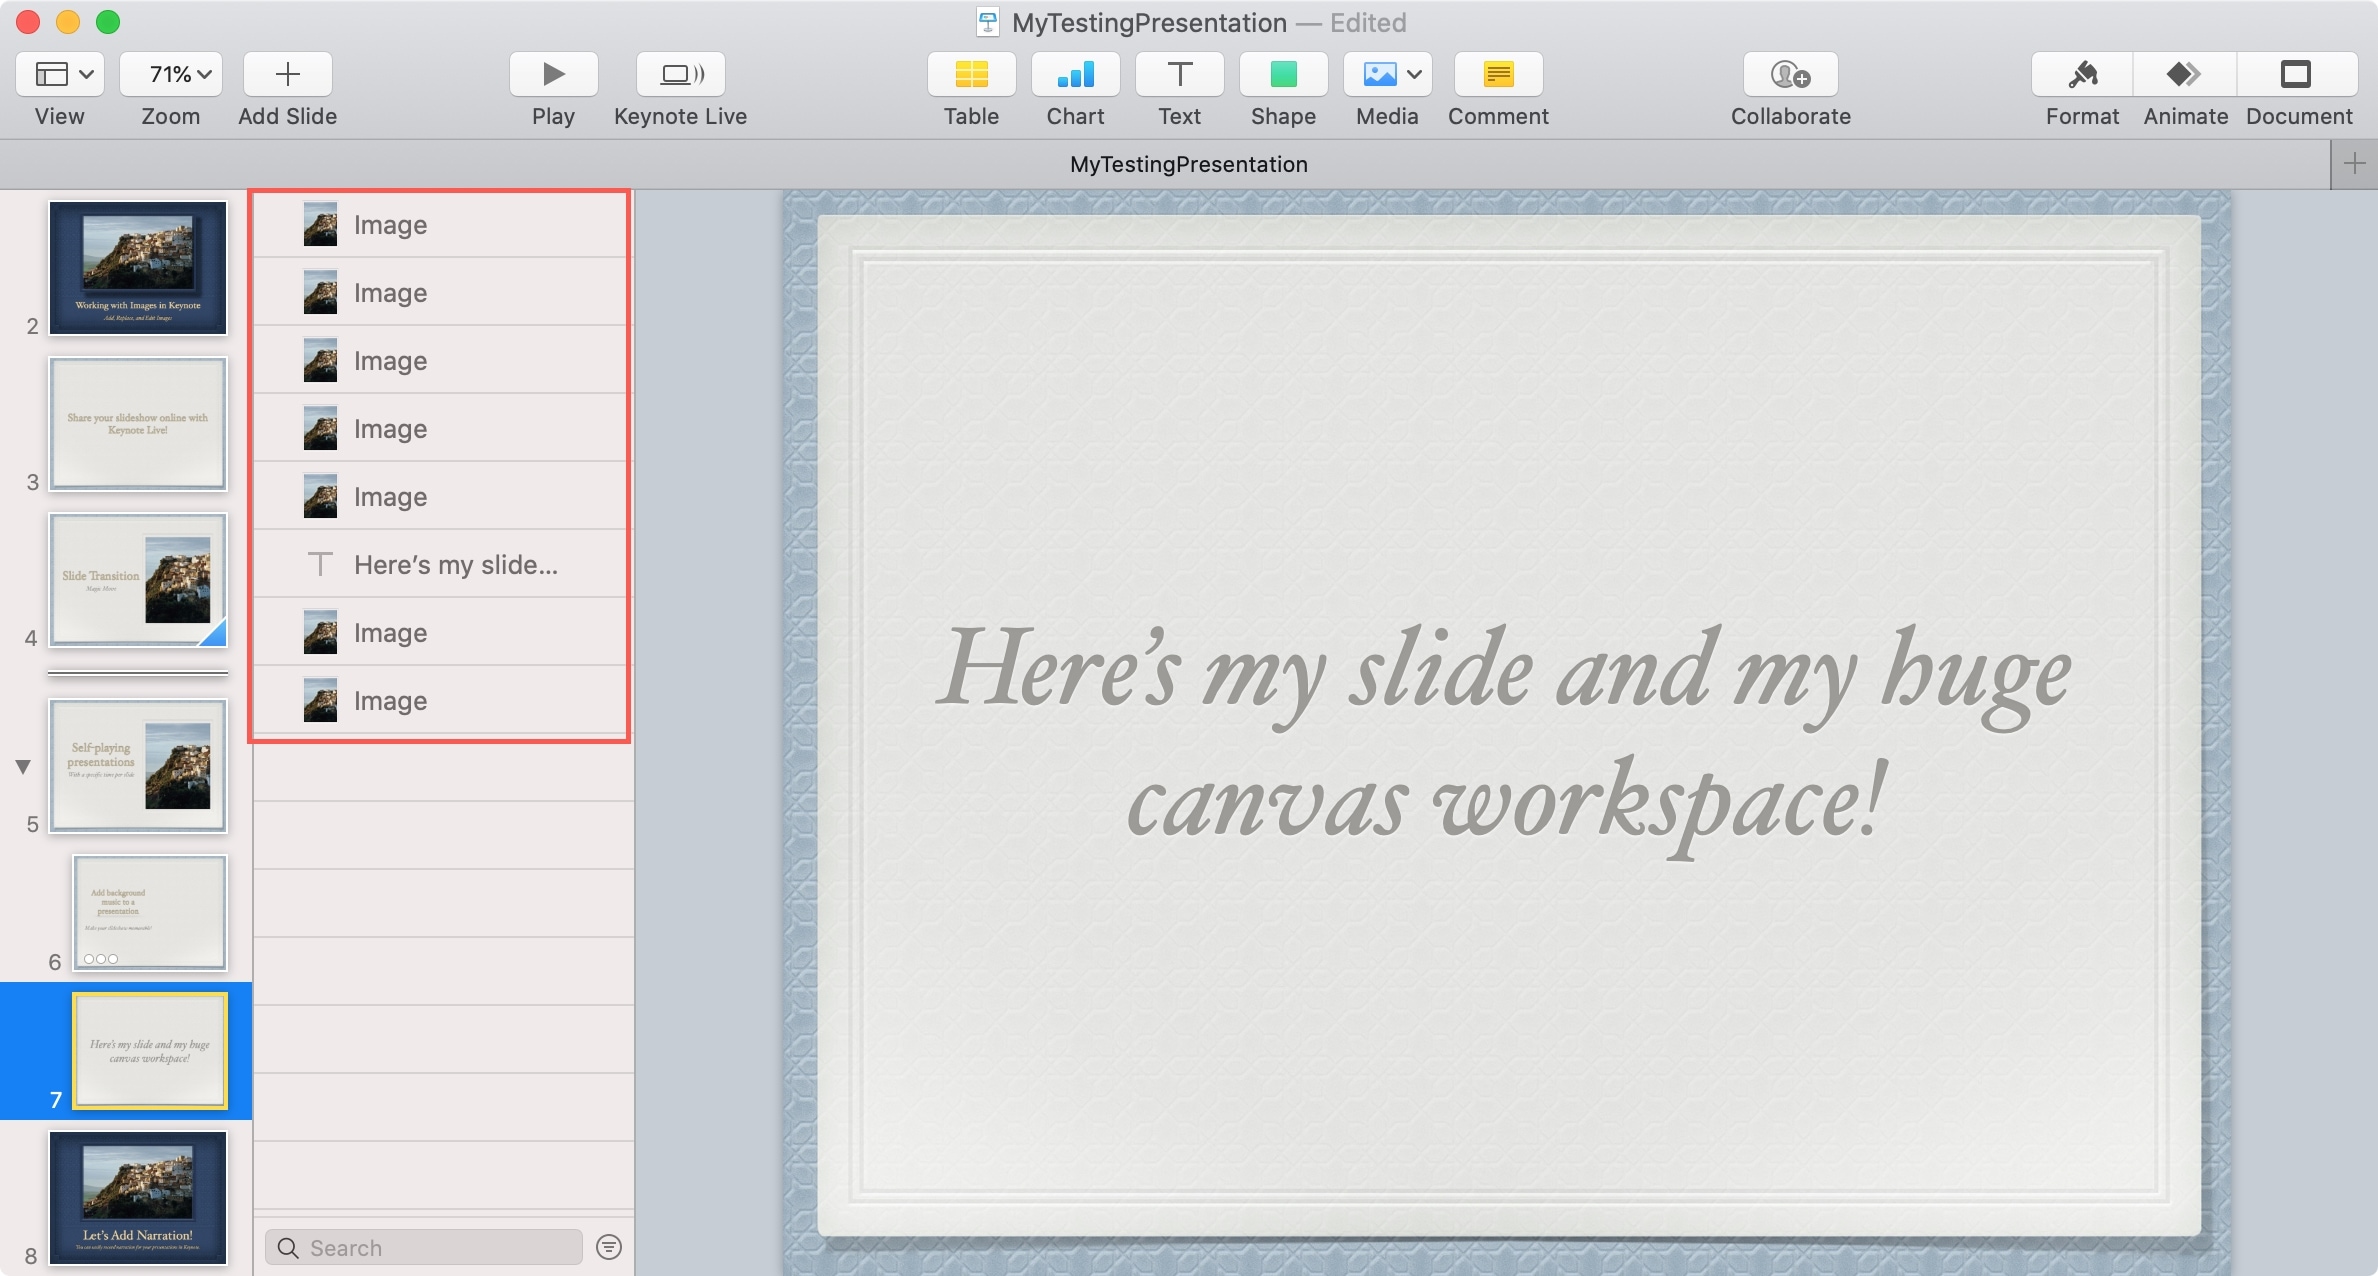
Click View from the toolbar and pick Show Object List. You’ll then see all of the objects on the canvas. Pick one to format it as you normally would with the Format button and sidebar on the right.

And if an object is in view, you can still drag it back onto the slide where you want.
To close the list, click View > Hide Object List from the toolbar.
Remember, you can enter and exit that expanded workspace whenever you need with the steps above.
Wrapping it up
Hopefully this how-to will help you give you the space you need to work with your slides, especially those complex ones with a lot of objects and other elements.
Do you have any tips like this for Keynote you’d like to share with our readers? If so, comment below or hit us up on Twitter!
For more, take a look at how to use Keynote Live to share your presentation online or create basic graphs and charts in Keynote on your Mac.