Patch Tuesday alert! Protect your machine by pausing updates
If you’re running Win10 1903 or 1909, setting up a temporary patching pause is quick and easy. Other versions, not so much. Opt out of cannon-fodder mode with these simple steps.
by Woody LeonhardThe past couple of months have gone reasonably well in the Automatic Update world — we saw a convincing Keystone Kops rendition in September, which continued into October, but November was relatively benign (unless you’re using Access).
My guess is that December will be relatively quiet, too, because so many Microsofties are on vacation. But you never know. Microsoft, eh?
Yes, you have to get patched eventually. But there’s very little reason to jump head first into the pernicious patching pit. Get Automatic Update disentangled for a while — defer it, pause it, put a cork in it — and wait while we all watch the unpaid beta-testers take one for the Gipper.
Blocking automatic update on Win7 and 8.1
If you’re using Windows 7 or 8.1, click Start > Control Panel > System and Security. Under Windows Update, click the "Turn automatic updating on or off" link. Click the "Change Settings" link on the left. Verify that you have Important Updates set to "Never check for updates (not recommended)" and click OK.
Blocking automatic update on Win10
Not sure which version of Win10 you’re running? Down in the Search box, near the Start button, type About, then click About your PC. The version number appears on the right under Windows specifications.
If you’re on Win10 version 1803, it’s time to pack your bags and move on. Microsoft’s pushing hard to get your machine to version 1909 right now, but you don’t have to dance to the ‘Softies' tune. I talk about your options in "Running Win10 version 1803 or 1809? You have options. Here’s how to control your upgrade." Once you've decided where to land, move on to 1809 or 1903 or 1909 before you temporarily block this month’s patches. @PKCano has a newly updated list of 1803 upgrade deferral settings and their effects on AskWoody.
If you’re using Win10 Pro version 1809, I recommend an update blocking technique that Microsoft shows for “Broad Release” in its obscure Build deployment rings for Windows 10 updates — which is intended for admins, but applies to you, too. (Thx, @zero2dash.)
Step 1. Using an administrative account, click Start > Settings > Update & Security.
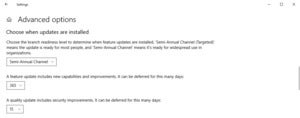
Step 2. On the left, choose Windows Update. On the right, click the link for Advanced options. You see the settings in the screenshot.

Step 3. The first box — “Semi-Annual Channel” — is no longer recognized by Microsoft. It has changed the terminology over and over again. In our newly redefined update world, choosing “Semi-Annual Channel” adds 60 days to the “feature update” setting discussed in the next step. I recommend that you nod, wink and, in the first box, choose Semi-Annual Channel.
Step 4. To further delay new versions until they’ve been minimally tested, roll the “feature update” deferral setting all the way up to 365 days. That tells the Windows Updater (unless Microsoft makes another “mistake,” as it has numerous times in the past) that it should wait until 425 days after a new version is released (60 days for Semi-Annual Channel + 365 days deferral) before upgrading and re-installing Windows on your machine.
Of course, nobody expects Microsoft to refrain from upgrading your 1809 machine until July 19, 2020 ( = version 1903 release date + 425 days): Even though those settings appear here, Microsoft has already warned that it’s going to push your 1809 machine onto 1909. We just don’t know exactly how hard it's going to push quite yet.
My production machines are still on 1809, awaiting the results of this month’s 1903 patches — I'm still not convinced that 1903 is stable enough — so don’t feel left out if you haven’t yet moved on. If you’d like to block a forced upgrade to 1909 for the foreseeable future, follow the instructions in How to block the Windows 10 November 2019 Update, version 1909, from installing.
Step 5. To delay cumulative updates, set the “quality update” deferral to 15 days or so. (“Quality update” = cumulative update = bug fix.) In my experience, Microsoft usually yanks bad Win10 cumulative updates within a couple of weeks of their initial release. By setting this to 10 or 15 or 20 days, Win10 will update itself after the major screams of pain have subsided and (with some luck) the bad cumulative updates have been pulled or reissued. Notably, in February 2019, it took Microsoft 18 days to fix its first-Tuesday bugs.
Step 6. Just “X” out of the settings pane. You don’t need to explicitly save anything.
In the past I’ve recommended that you avoid clicking “Check for updates” simply because, up until a few months ago, clicking “Check for updates” would automatically install everything Microsoft had backed up for your machine, without giving you a chance to peruse the items on offer. It now appears as if Microsoft has seen the error of its ways, and no longer crams everything on your machine, should you have the temerity to “Check.” Still, I’m a superstitious old cuss with a long memory. I won’t be clicking “Check for updates” any time soon.
If there are any real howlers — months where the cumulative updates were irretrievably bad, and never got any better, as they were in July 2018 — we’ll let you know, loud and clear.
Tired old approach for Win10 Home 1809
If you have Win10 Home, version 1809, your only reasonable option (other than installing a third-party patch blocker) is to set your internet connection to “metered.” Metered connections are an update-blocking kludge that seems to work to fend off cumulative updates, but as best I can tell still doesn’t have Microsoft’s official endorsement as a cumulative update prophylactic. Worryingly, there are some reports that Microsoft is pushing for upgrades even if they go over metered connections.
To set your Ethernet connection as metered: Using an administrator account, click Start > Settings > Network & Internet. On the left, choose Ethernet. On the right, click on your Ethernet connection. Then move the slider for Metered connection to On.
To set your Wi-Fi connection as metered: Using an administrator account, click Start > Settings > Network & Internet. On the left, choose Wi-Fi. On the right, click on your Wi-Fi connection. Move the slider for Metered connection to On.
If you set your internet connection to metered, you need to watch closely as the month unfolds, and judge when it’s safe to let the demons in the door. At that point, turn “metered” off, and just let your machine update itself.
There’s a better way with Win10 versions 1903 or 1909
I’m close to installing 1903 on my production machines, but haven’t yet made the plunge. It still hasn’t been stable enough, for long enough, to get my wholehearted endorsement. If you’ve already upgraded to 1903 or 1909, though, your patching life is considerably simpler.
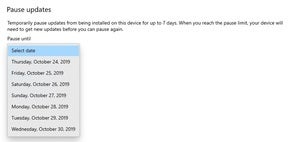
In version 1903 or 1909 (either Home or Pro), using an administrator account, click Start > Settings > Update & Security. At the top, click the Pause updates for 7 days button.

That button changes so it says Pause updates for 7 more days. Click it two more times, for a total of 21 paused days. That defers all updates on your machines until 21 days after you click the button. Once set, you can’t extend the deferral any longer unless you install all the outstanding cumulative updates to that point.
Historically, 21 days has sufficed to avoid the worst problems.
Grab a box of popcorn and join us for the monthly Patch Wake on AskWoody.