How to download, install, manage and use custom fonts on your iPhone and iPad
by Christian Zibreg
Thanks to the font management improvements in iOS 13 and iPadOS, it’s easy to download custom fonts from App Store and use them to make something impactful in documents you create on iPhone. Follow along with iDownloadBlog’s detailed step-by-step tutorial to learn how to download, install, manage and use custom fonts on your iPhone and iPad.
iOS 13 and iPadOS have brought out font support for all system fonts, as well as various new fonts which can now be downloaded from App Store. Fonts give every project a distinct personality. By decking up your iPhone, iPad or iPod touch with fonts, you can use them in compatible apps to create rich typographic experiences that fit specific moods and styles.
Introducing custom fonts in iOS 13 and iPadOS
The following font file formats are supported in iOS 13 and iPadOS:
- TTF (TrueType Font): TrueType is an outline font standard developed jointly by Apple and Microsoft in the late 1980s with the goal of rivaling Adobe’s Type 1 vector fonts that were commonly used in its Postscript page-description language for desktop publishing. It’s the most common format for fonts on both Windows and macOS.
- OTF (OpenType Font): Built on its predecessor TrueType, the OpenType format for scalable computer fonts was developed by Adobe and Microsoft back in 1996. Combining aspects of both PostScript and TrueType, the OpenType fonts are supported by a myriad of platforms, including macOS, Linux and Windows 2000 and later.
- TTC (TrueType Collection): This is an extension of the TrueType format that, aside from other features, enables bundling of fonts in a single file which enables multiple fonts to share glyph sets while reducing storage requirements.
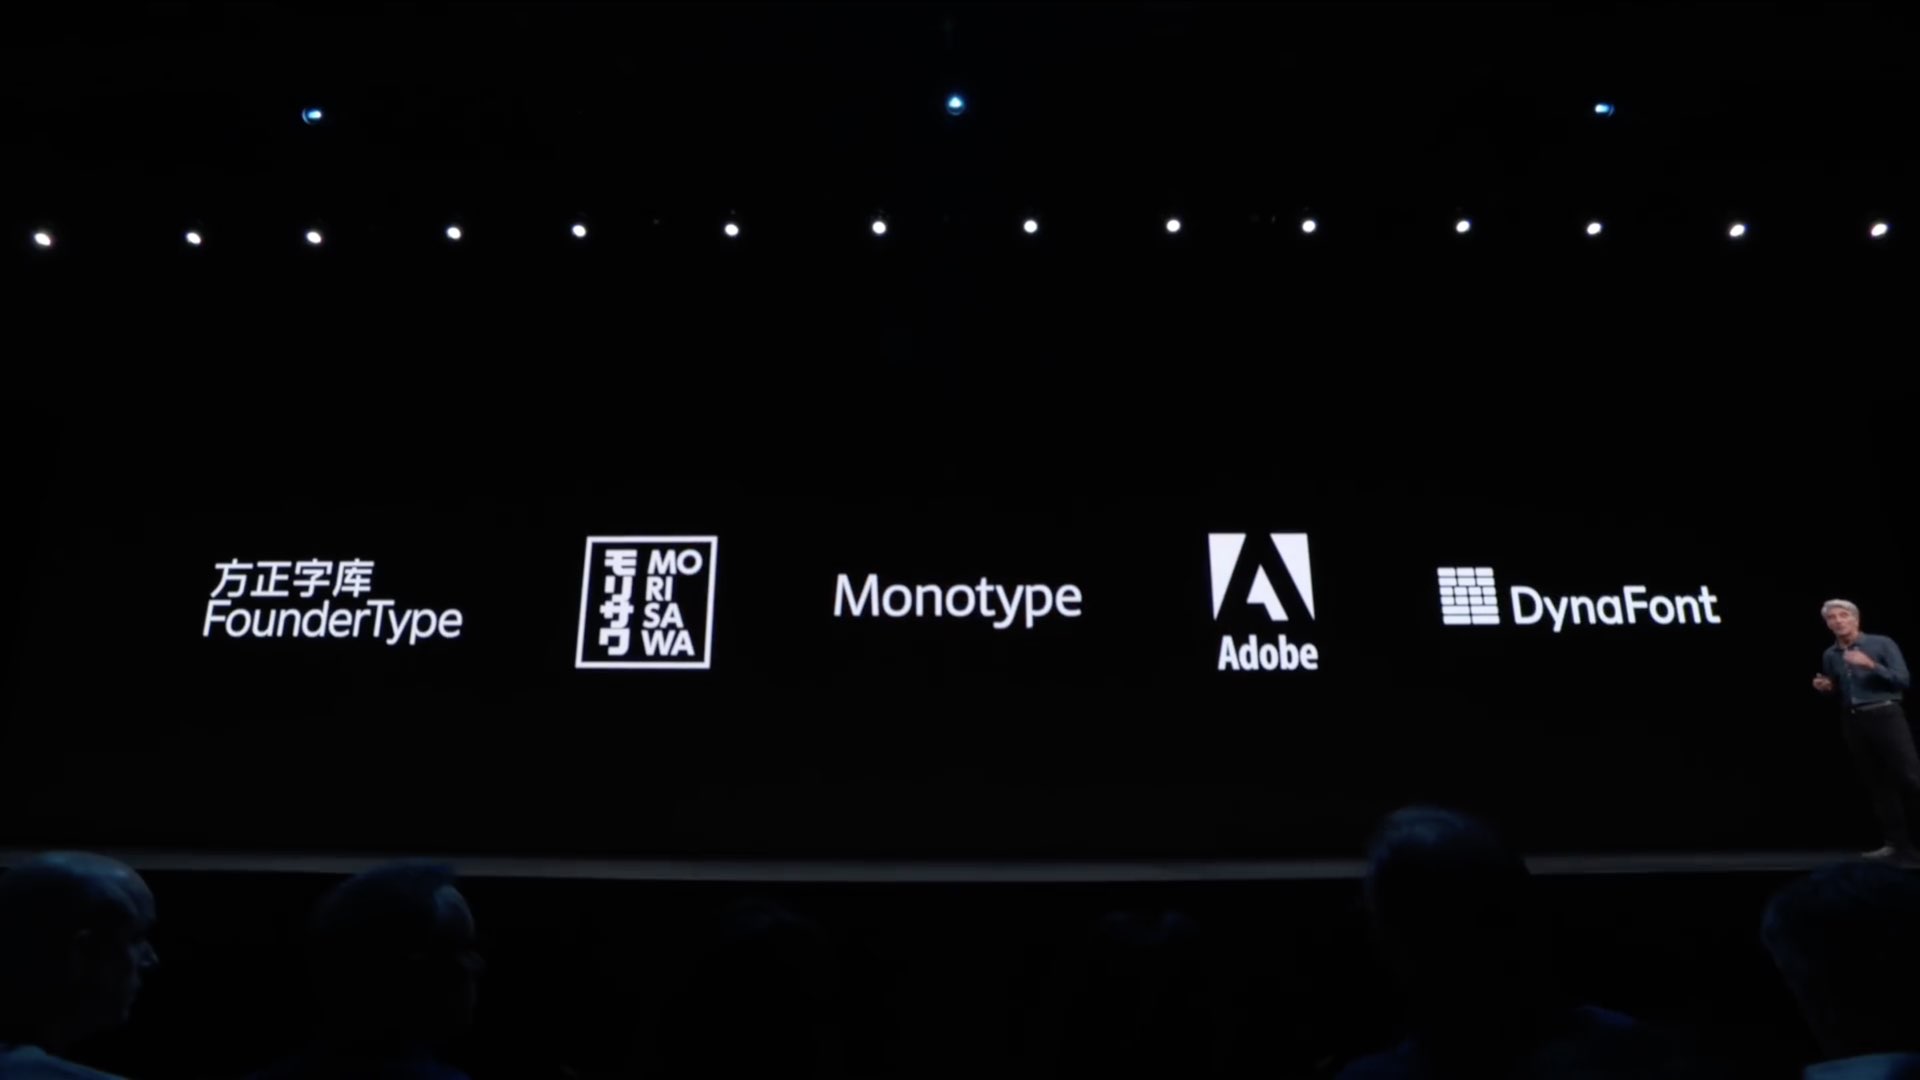
Apple’s partnered with these boutique and major providers to offer fonts on App Store:
While the options above may be limited, other providers should over time bring additional custom fonts to the iOS and iPadOS platforms through App Store. Speaking of which, custom fonts in iOS 13 and iPadOS are delivered via App Store apps that bundle them.
There’s also an alternative method of font delivery that works on older iOS versions but it’s a bit risky as it requires installing unsigned configuration profiles that could also be used to inject malware or steal your precious data and private information from the device.
Two ways to obtain custom fonts
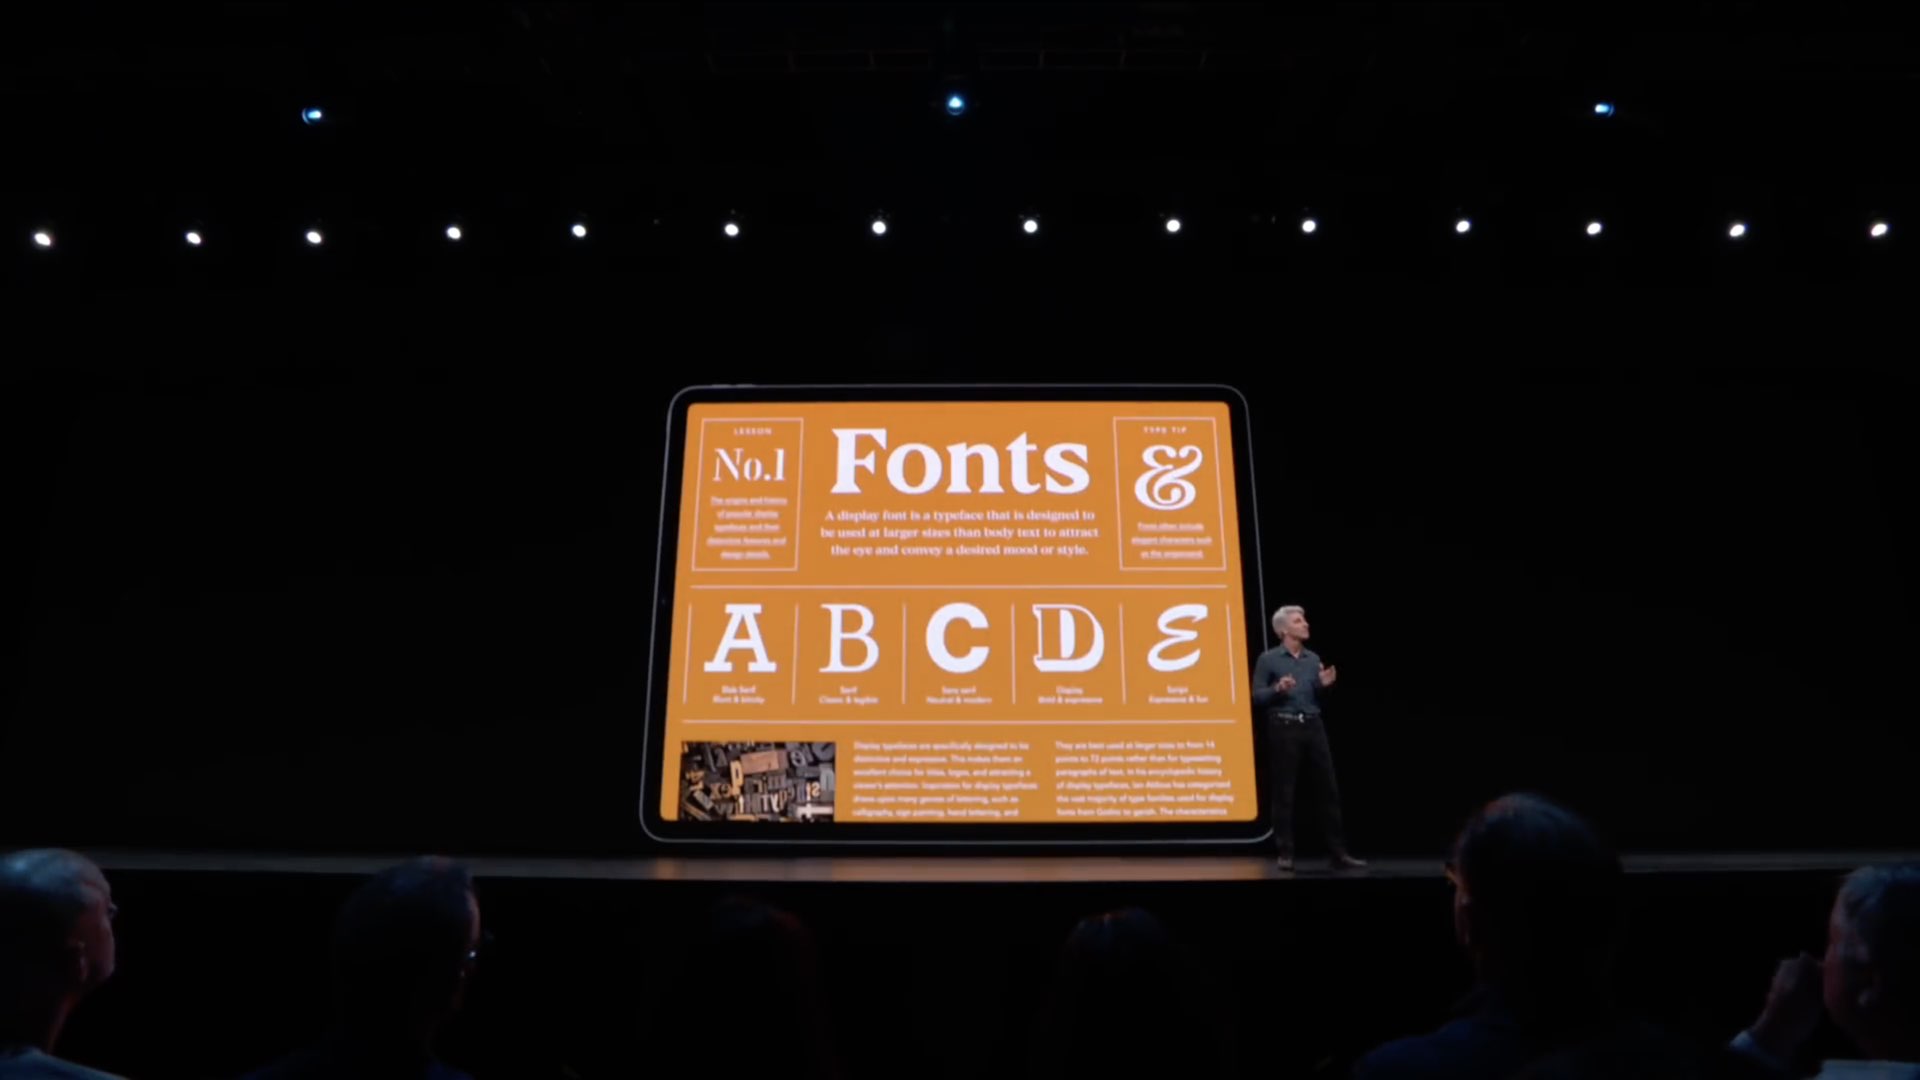
Importantly, custom fonts are not automagically available in all apps that offer text formatting. Rather, third-party apps must adopt Apple’s new API in iOS 13 and iPadOS which takes care of providing a nice font-picker interface that provides a consistent way for users to select fonts and styles in apps. If your favorite app doesn’t yet support custom fonts, a future update could add that capability so keep an eye on those update descriptions on App Store.
Here are some of the Apple apps that let you work with custom fonts:
Among the major third-party apps that support using custom fonts in documents include Adobe’s Photoshop for iPad and the upcoming Illustrator app.
While some apps did support downloadable fonts before iOS 13 and iPadOS came along, those are third-party keyboards that bring custom characters to apps like Instagram, WhatsApp, Snapchat, Messages and others, regardless of whether or not the app uses Apple’s API.
On the downside, that method can be quite risky, especially for beginners because they’re supposed to trust a developer’s unsigned profile which needs to be installed.
For the sake of completeness, this tutorial covers both methods.
How to download custom fonts on iPhone and iPad
You can obtain custom fonts by downloading specialized apps from App Store that bundle them (iOS 13 or iPadOS required) or you can install them manually via configuration profiles (works on older iOS editions). Like with apps, downloadable fonts can be free or paid.
The former method particularly appeals to font foundries as it effectively bundles all the fonts the user is going to install with the app itself. The latter is better suited if you need to use custom fonts in an unsupported app, such as WhatsApp, or want to install fonts from your own personal collection in iCloud Drive, Dropbox or a similar cloud-storage platform.

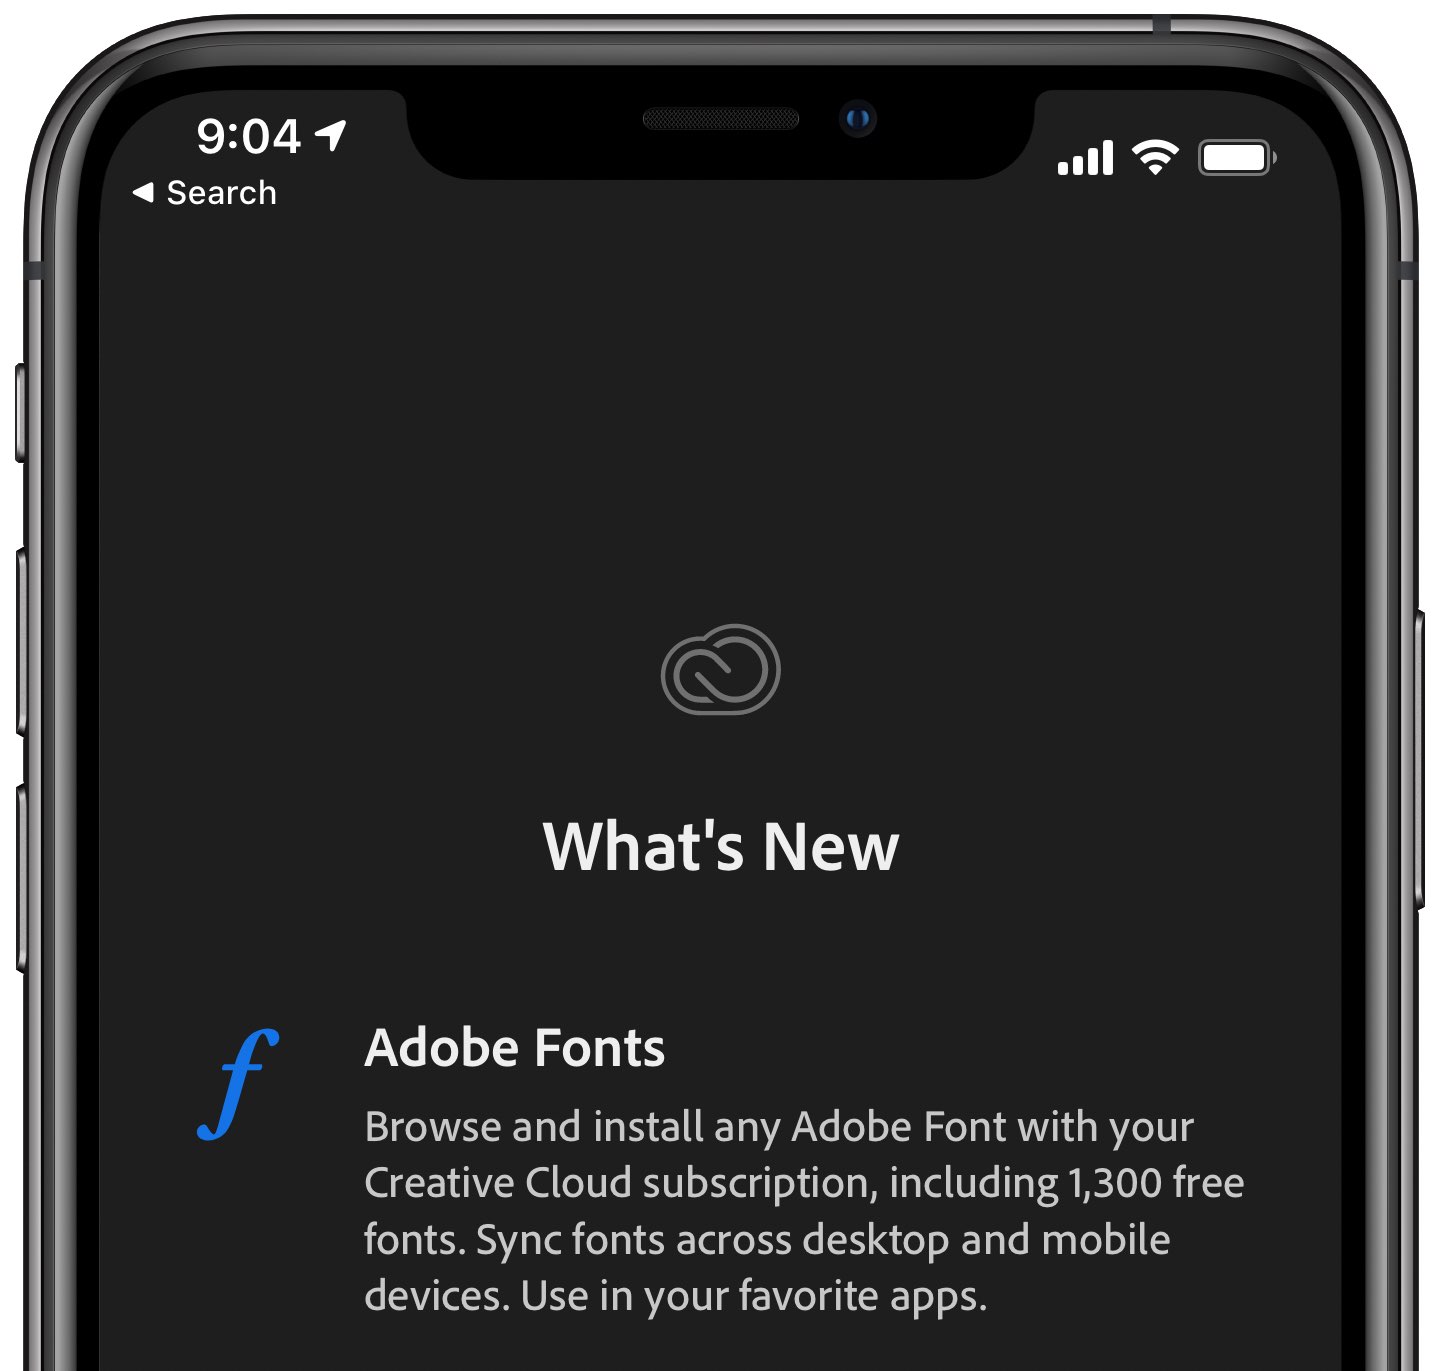
Creative Cloud app offers free fonts to non-subscribers.
Regardless of your preferred method, it’s important to keep in mind that any custom fonts you’ve installed on one device don’t automatically sync across all of your other devices through iCloud. In other words, you must manually install custom fonts on each device you wish to use them on. You also cannot override fonts that are already registered with iOS, plus the maximum number of registered fonts is limited by the operating system.
Method #1: App Store
This method works in iOS 13.0 or newer or iPadOS or later.
After downloading an app from the App Store which bundles fonts, simply launch it on your device and find the right option to install fonts. Some of the recommended apps that provide system-wide custom fonts include Adobe’s Creative Cloud, Font Diner, Fonteer and more.
Others may provide fonts as downloadable on-demand resources, like iFont which lets you pick a provider such as Google Fonts, Fontspace or Font Squirrel to gather fonts from into collections. Searching for “Fonts for iPhone” on App Store should surface additional apps.
Adobe is perhaps the easiest choice for hassle-free font delivery.
Adobe recently enabled Creative Cloud subscribers to download more than 17,000 fonts and use them in iPhone and iPad apps that are compatible with Apple’s new font picker in iOS 13 and iPadOS. More importantly, a cool 1,300 fonts are available completely free of charge without a paid Creative Cloud subscription, as per the company.
Read on for the step-by-step instructions for installing Adobe fonts on your iPhone or iPad.
Installing custom fonts with Adobe Creative Cloud
Users without a Creative Cloud subscription who happen to have an Adobe ID are permitted to freely access the 1,300 fonts that are included within the app for use on their iOS devices.
1) Open the Creative Cloud app on your iPhone or iPad with iOS 13.1 or later.
2) Go to the Fonts tab.
3) Tap the Install Fonts button next to the entry to download the font and its typefaces.
4) Tap Install in the system dialog to confirm the operation.
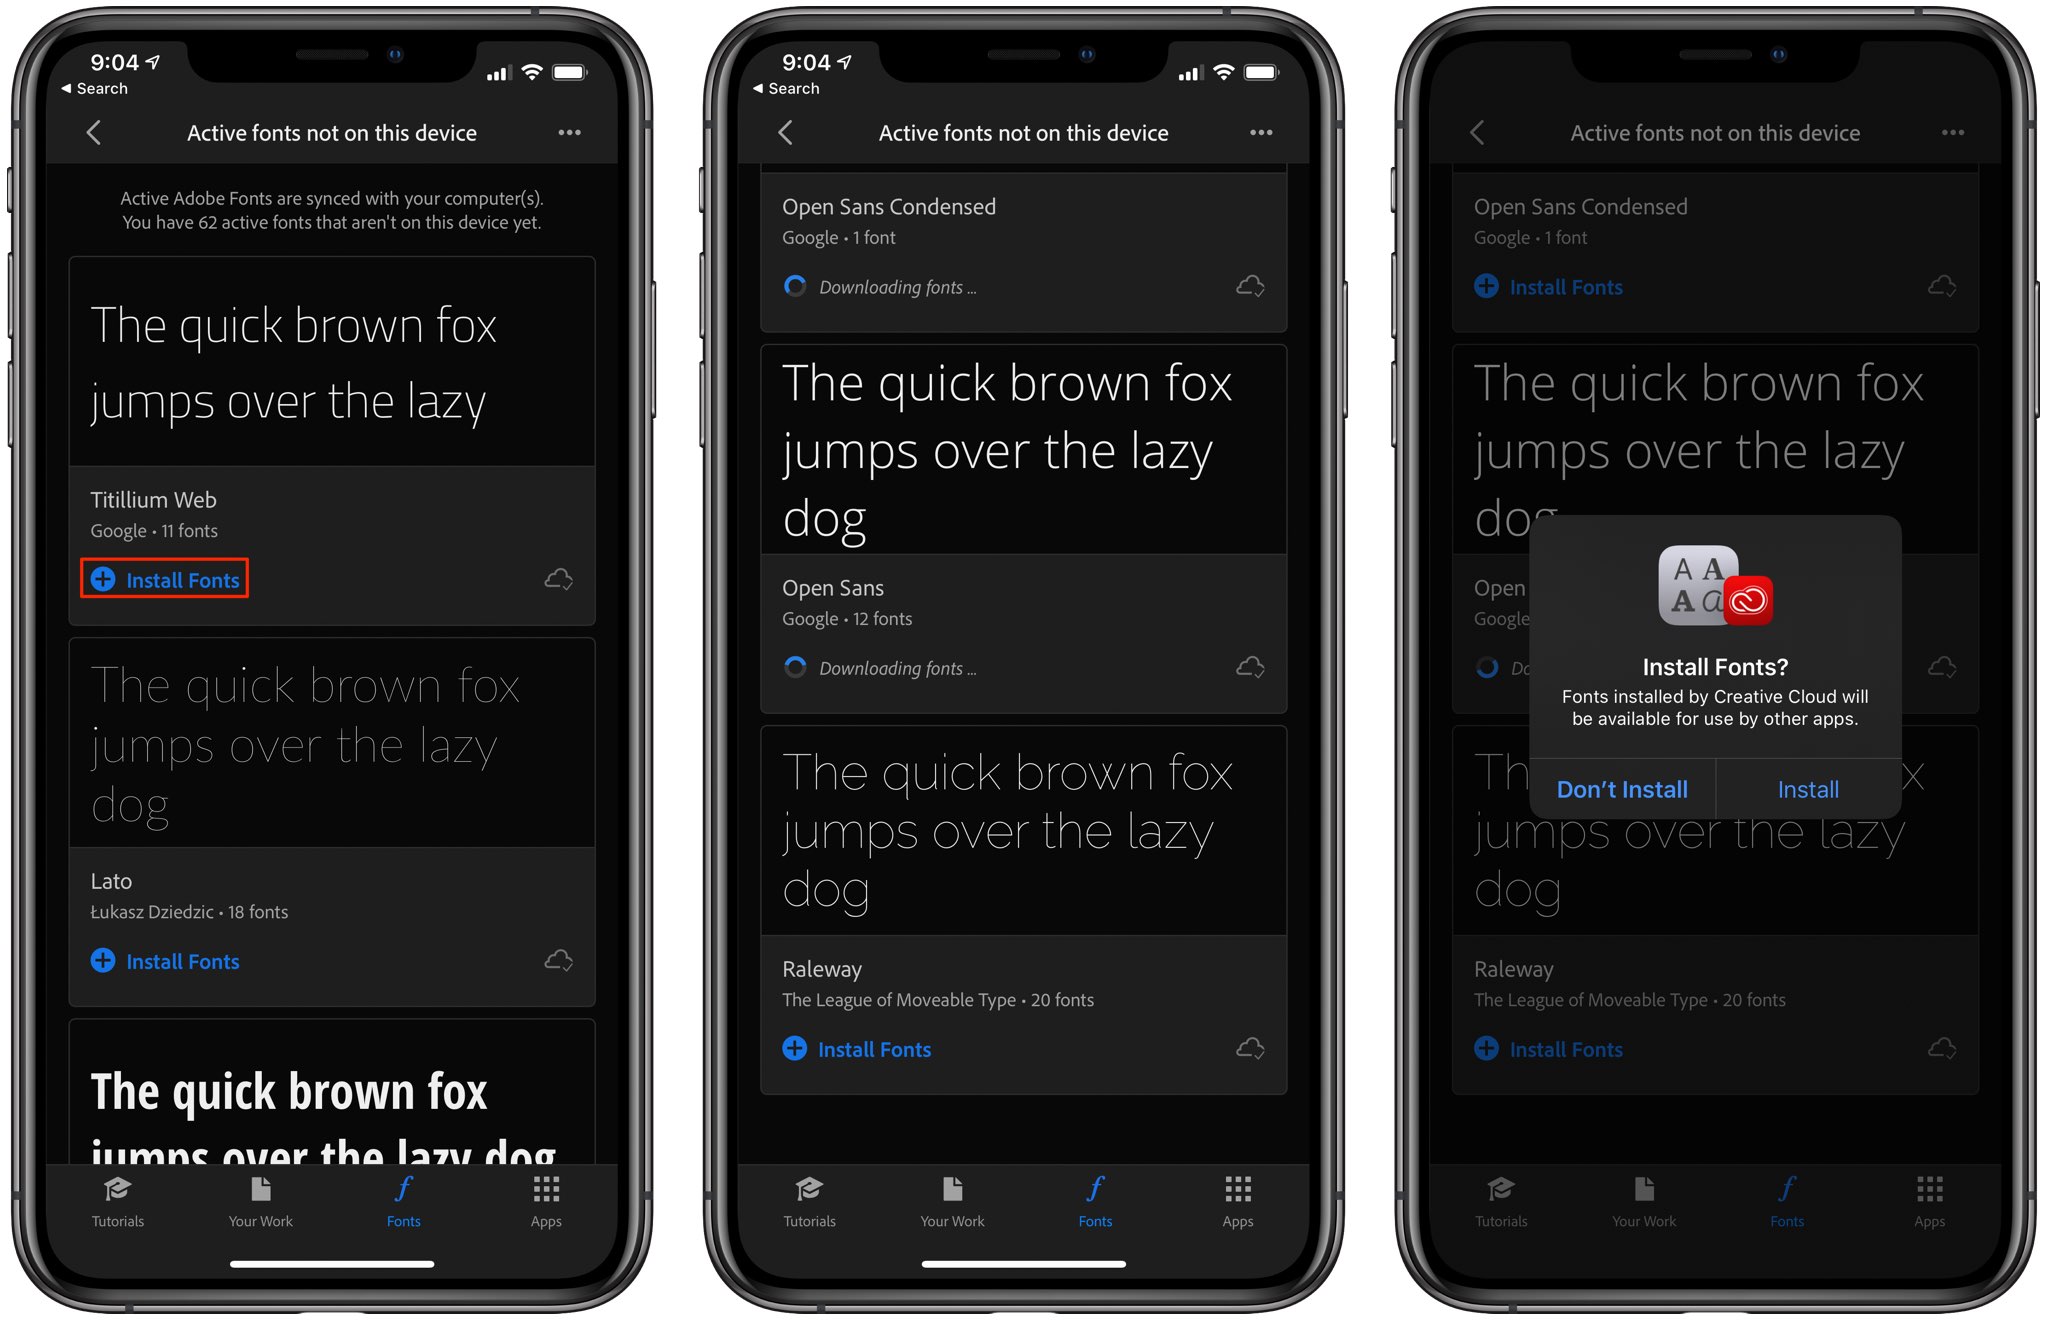
Fonts installed via the Creative Cloud mobile app are automatically activated across all your other devices. Have a subscription? You’ll enjoy the same access as you do on the desktop to all the 17,000 fonts included with Creative Cloud from type foundries around the world.

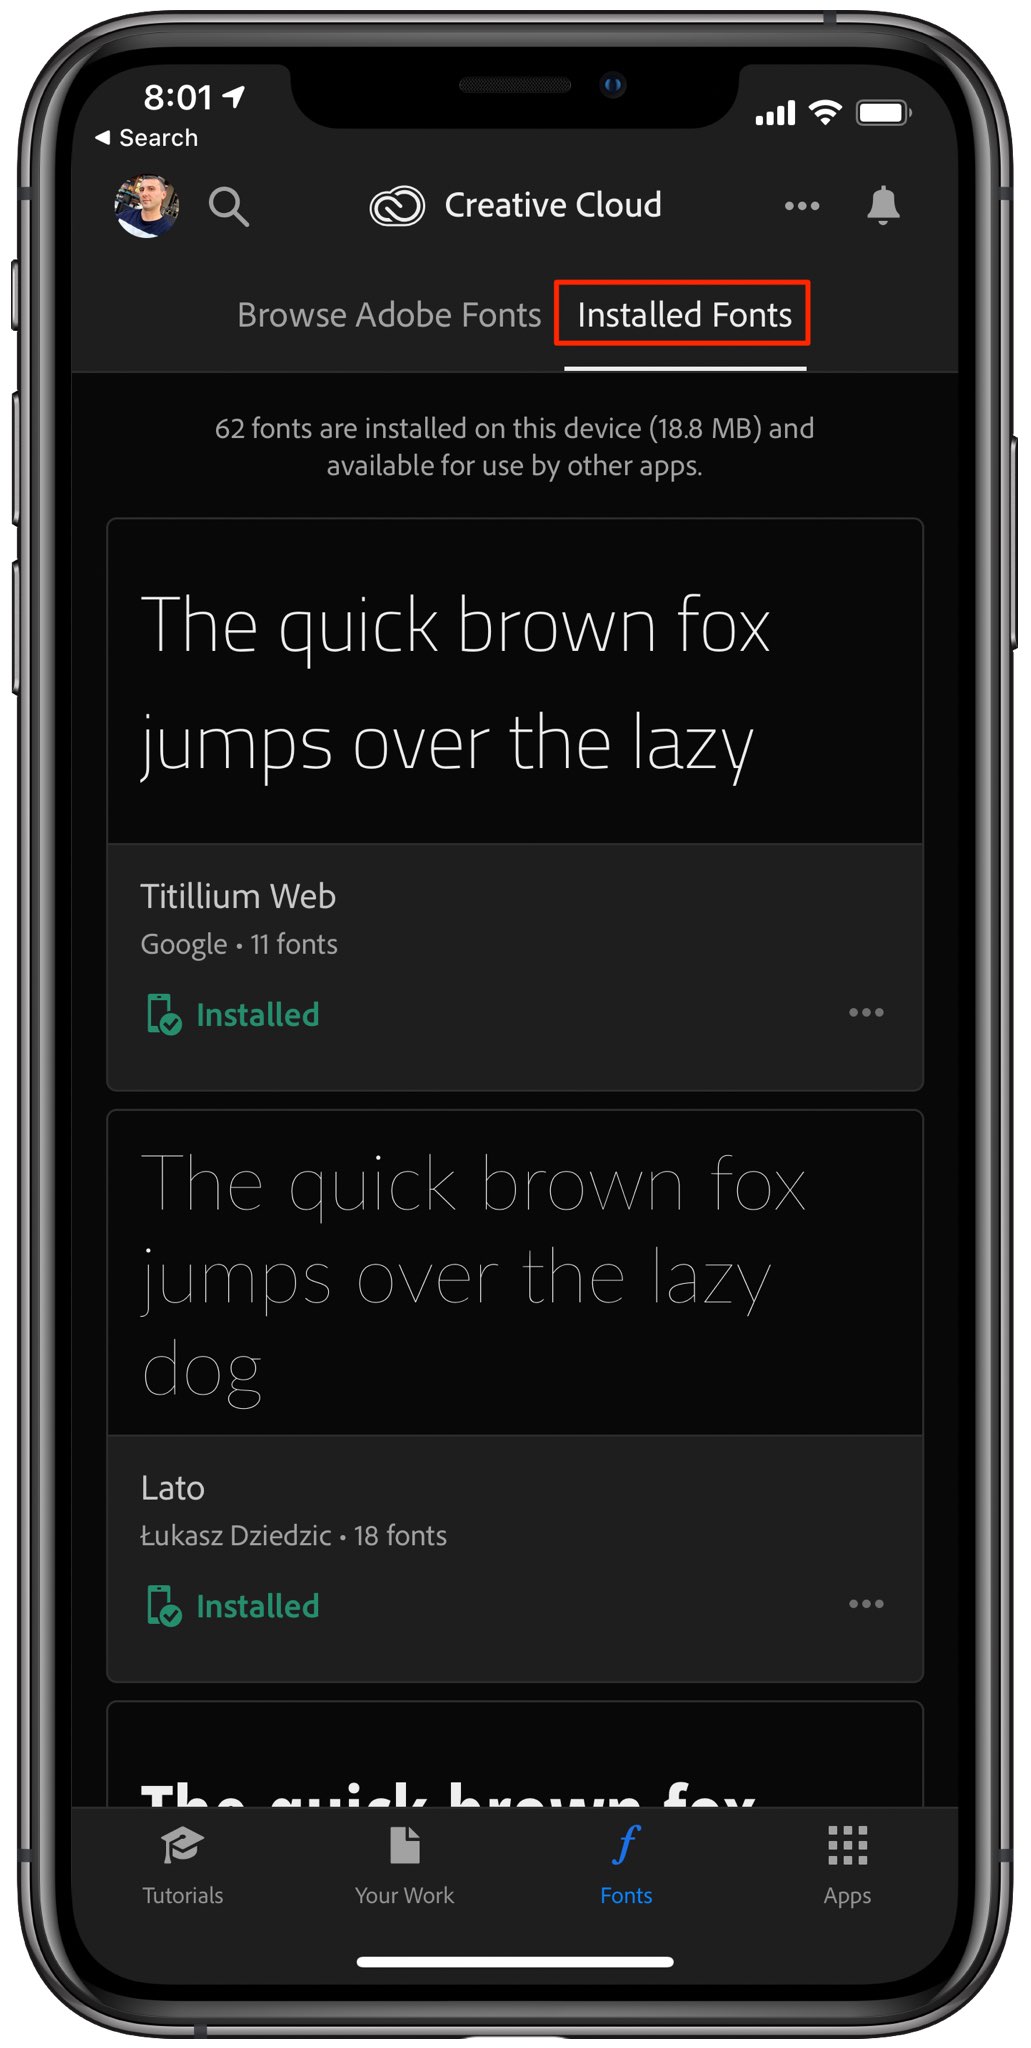
To view installed fonts, tap the Installed Fonts section.
To view the fonts you’ve installed with the Creative Cloud app, tap the Installed Fonts section within the app or visit your system-wide fonts hub in Settings → General → Fonts.
Installing custom fonts with Font Diner
Do the following to install custom fonts in the Font Diner app:
1) Launch Font Diner on your iPhone or iPad.
2) Tap the Home tab to access a list of all the available font families.
3) Hit Activate in the entry’s top-right corner to install the chosen font set.
4) Hit Agree.
5) Confirm the operation by tapping Install.
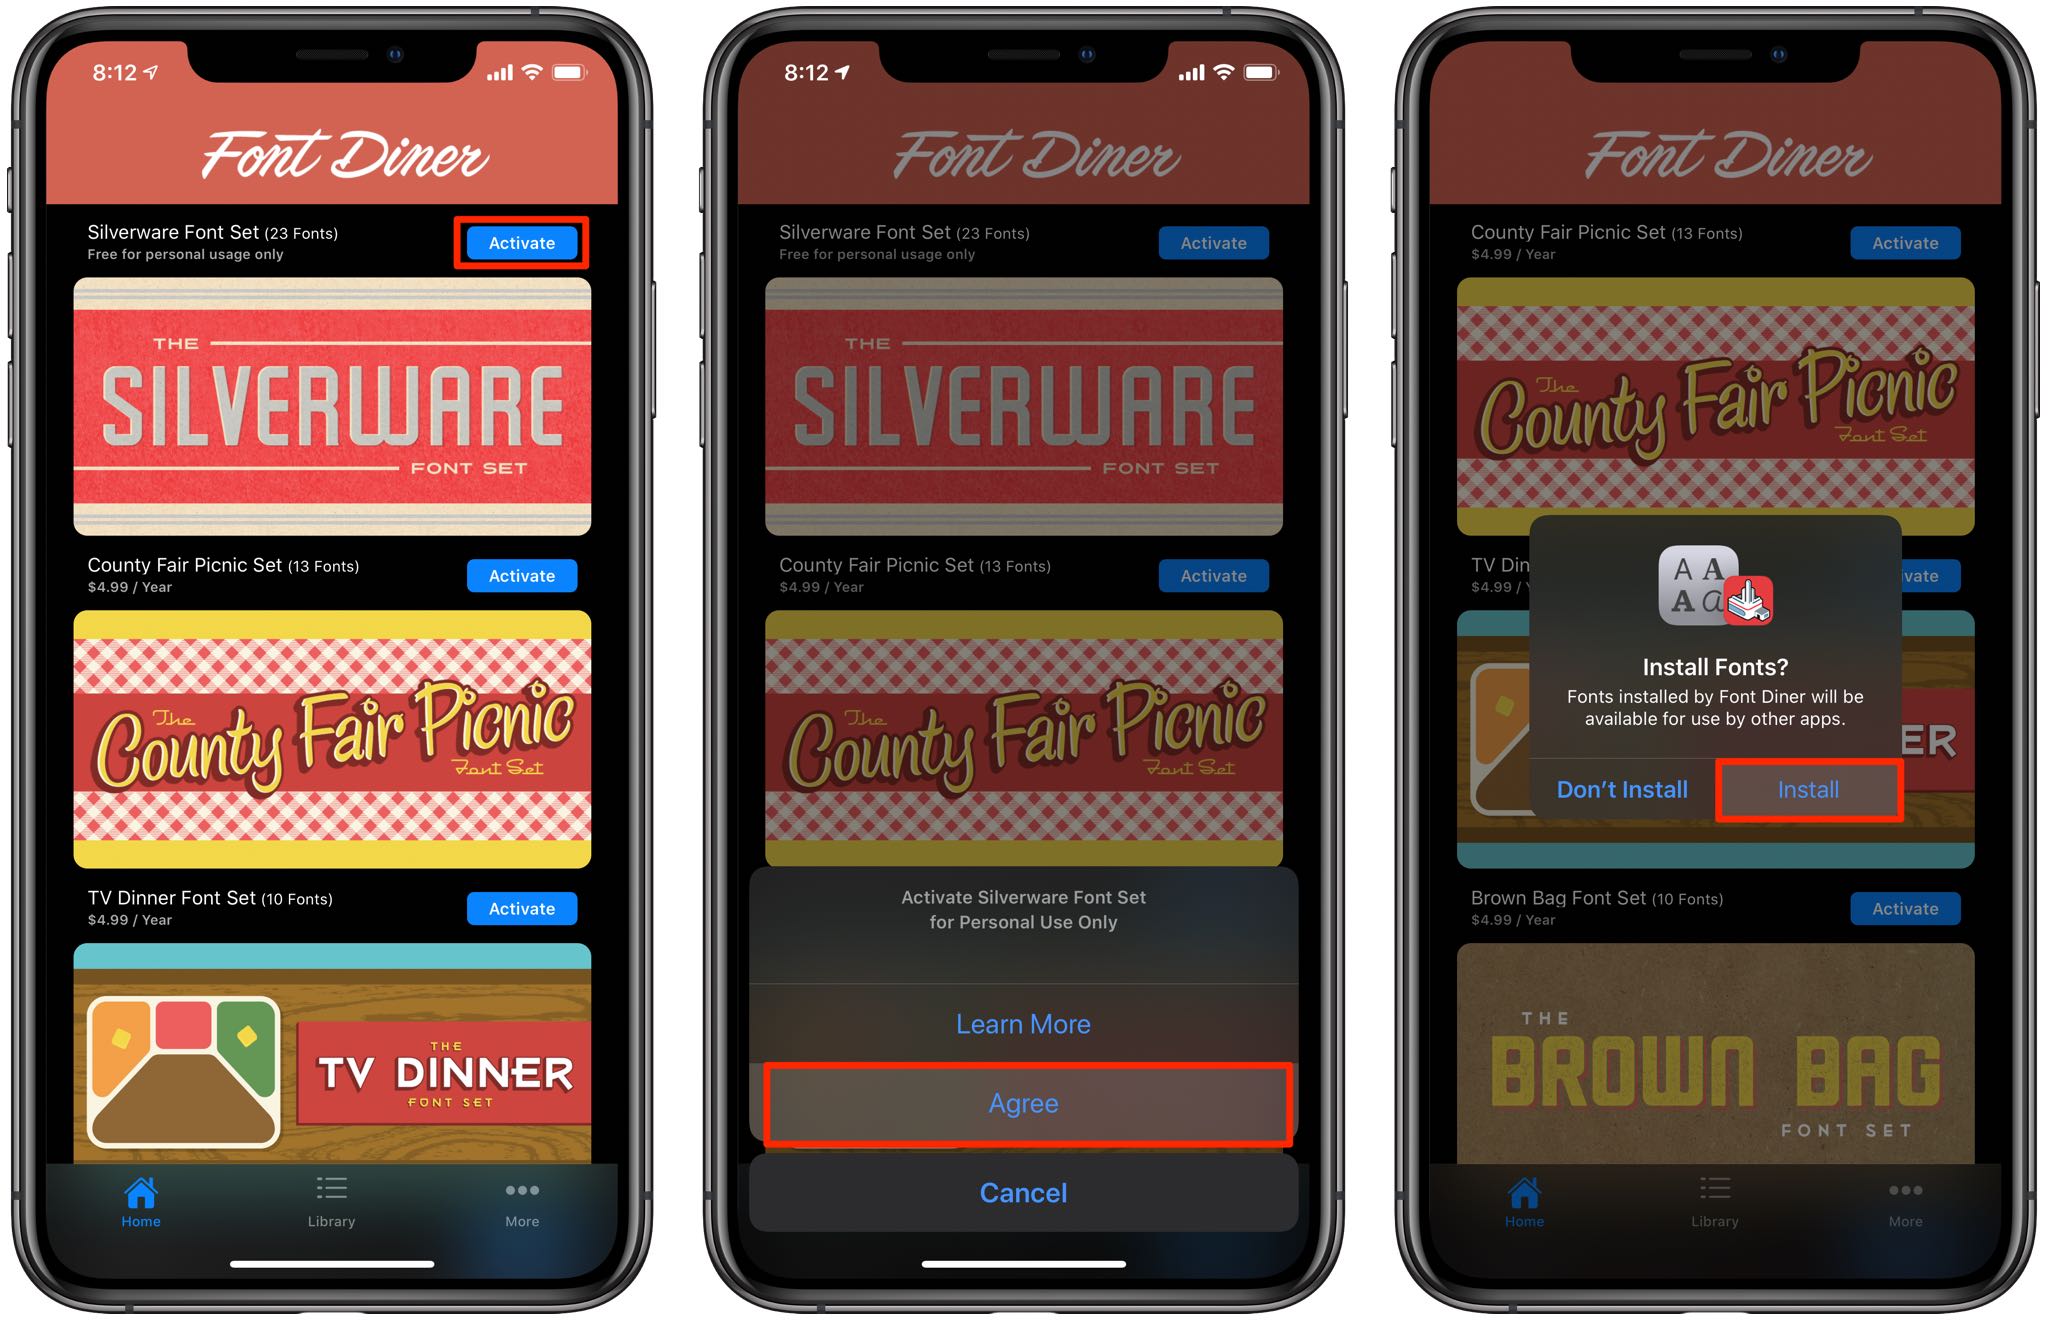
The downloaded fonts are now ready to be used on your iPhone or iPad.
Method #2: configuration profiles
Before iOS 13, people had to go through a much more cumbersome font-installation routine that involves configuration profiles. Any fonts installed in that way can be manager through the same central hub in the Settings app like the Apple-sanctioned App Store fonts.
Get started with this method by downloading one of these font managers from App Store:
I’m going to use the iFont app for the purpose of this tutorial.
1) Open the iFont app on your iOS device.
2) Tap the Get Fonts tab.
3) Select a provider you’d like to obtain custom fonts form, like Google Fonts.
4) Tap the plus sign next to a font that interests you, then hit Import to iFont.
5) You may see a dialog asking you to allow the profile. Tap Allow to permit the operation and close the popup when the profile is downloaded.
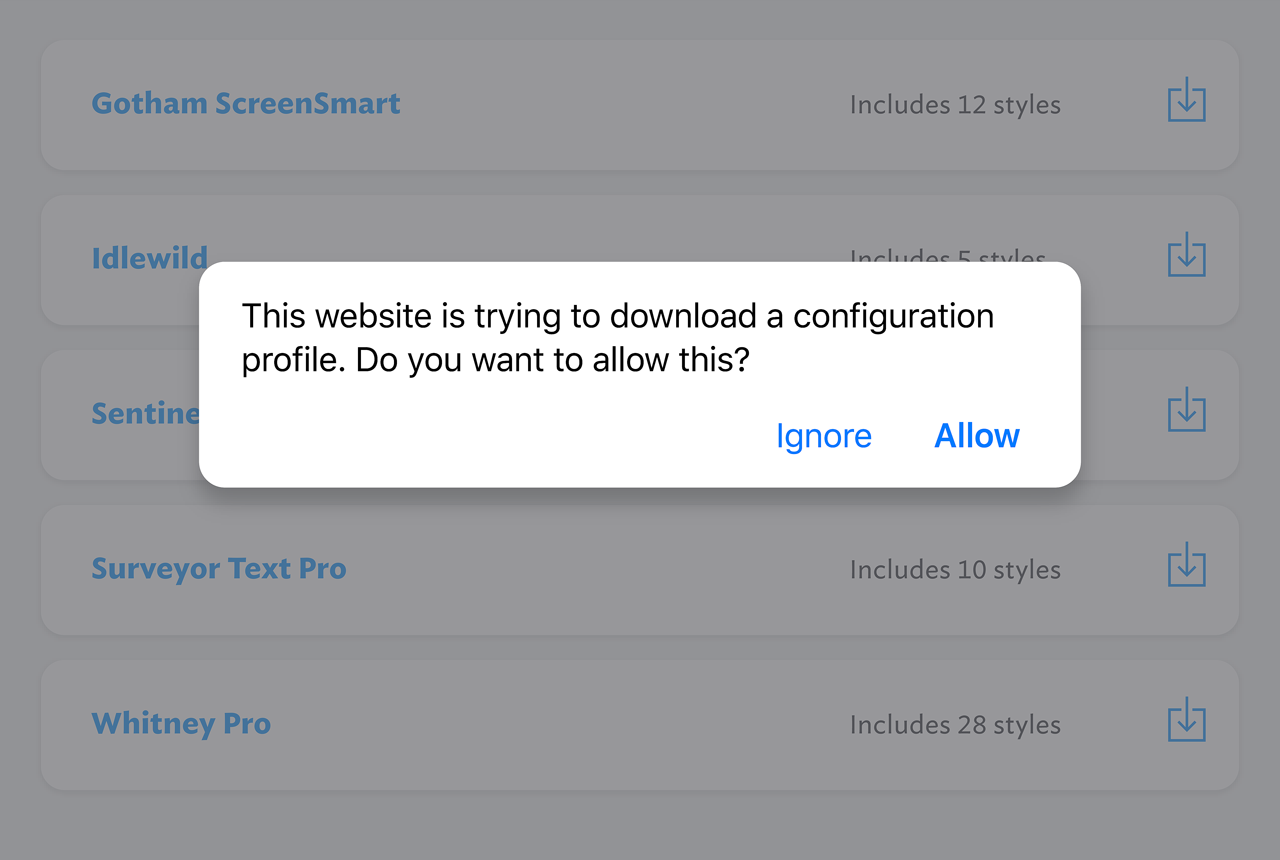
6) Now open the Settings app to install the downloaded profile, which will register the font imported into iFont with the iOS operating system.
7) Choose General from the list.
8) Tap Profiles or Profiles & Device Management.
9) Now tap your new font to see its details on the next screen.
10) Tap Install in the top-right corner.
11) A message says the profile that installs the selected font for system-wide use hasn’t been signed by Apple. Proceed at your own risk by tapping the Install button in the top-right corner.
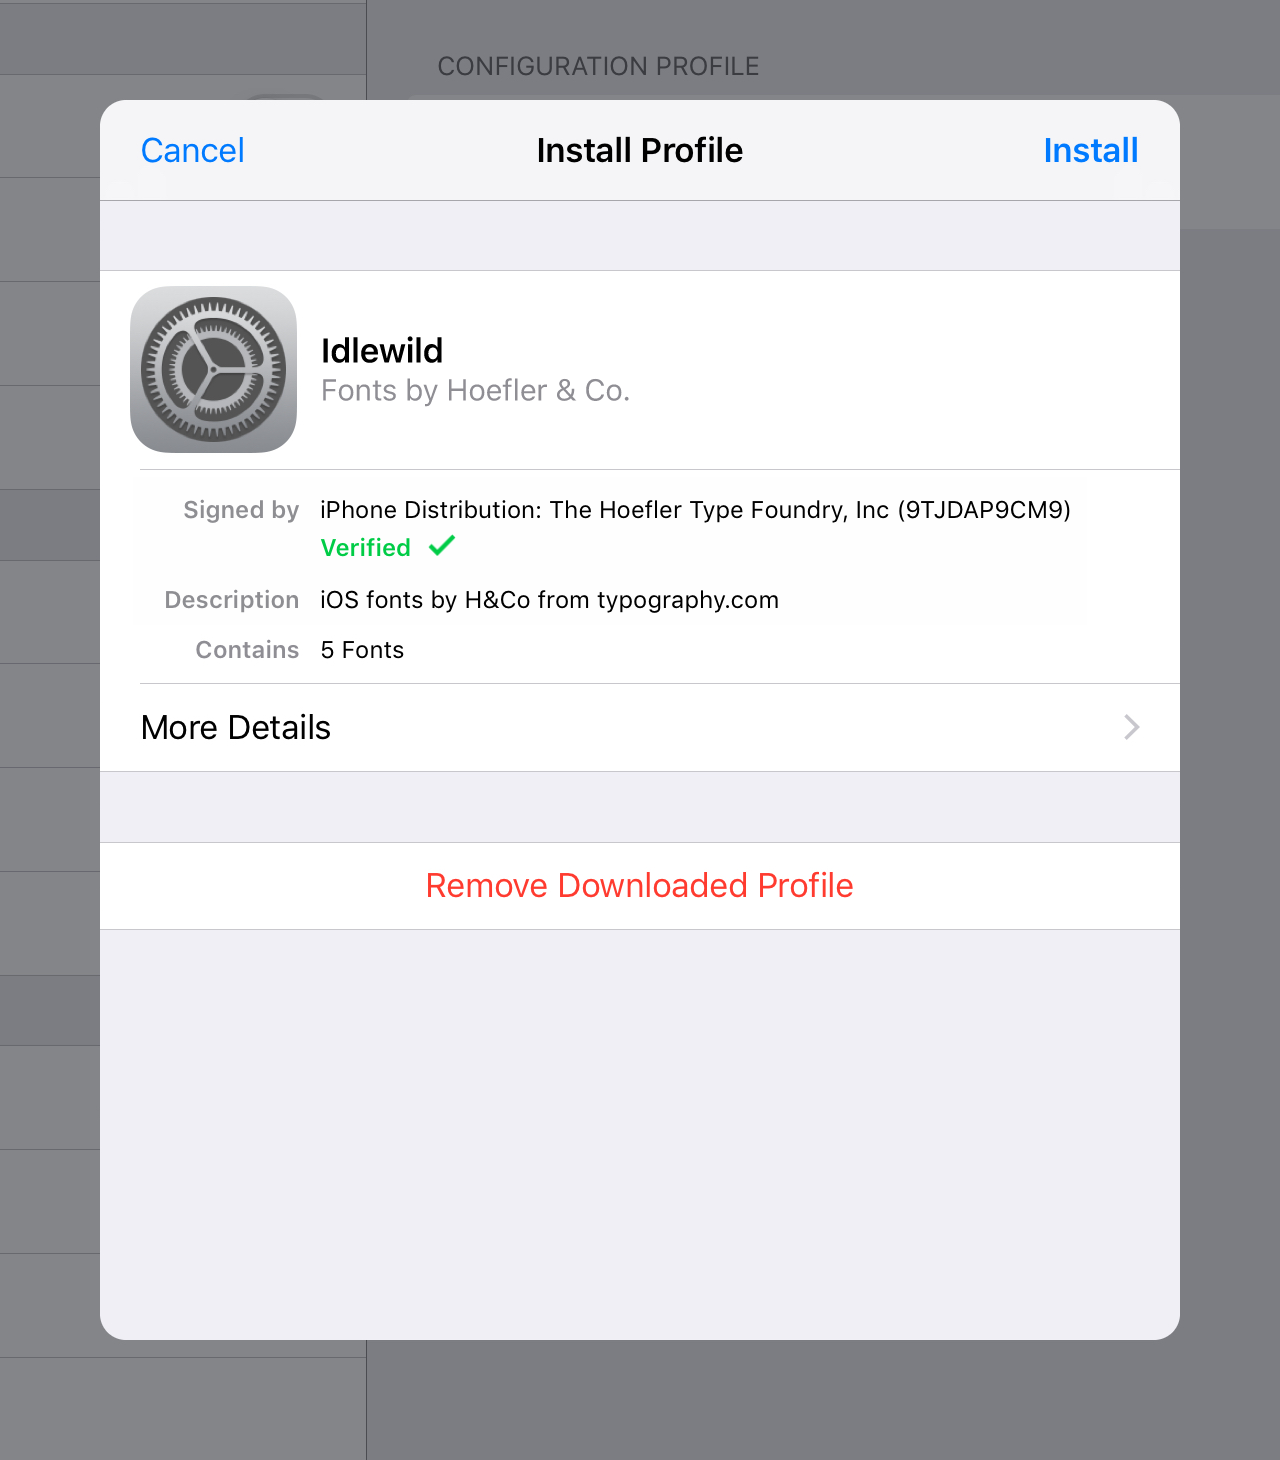
12) You may be asked to enter you device passcode so enter it and then tap Install again.
13) Lastly, tap Done after the profile is installed.
Again, use this method only if you trust the developer and its certificate. Otherwise, you may end up with malicious software running on your device. You can use the downloaded font in both compatible apps such as Mail or Photoshop and others that don’t yet use Apple’s API, like WhatsApp, Instagram and the like. Like with the Apple-sanctioned custom fonts on App Store, you can manage the fonts installed via configuration profiles from within the Settings app.
By the way, iFont is especially interesting because the app enables you to import your own font collections from a cloud-storage service such as iCloud Drive or Dropbox. You can even download fonts manually from the Internet in Safari, then import them to iFont from Safari’s Downloads folder (by default, Safari’s download manager puts downloaded items in the Files app, but you can pick another location for saving downloaded files within Safari’s settings).
How to manage custom fonts on iPhone and iPad
Use the font manager in the Settings app on iOS 13 and iPadOS to view information about your custom fonts, see how they look like, delete any typefaces you no longer need and more.
How to view custom fonts
All custom fonts you install on your device, regardless of the method used, are managed via a new section in the Settings app where you can check a font’s copyright information and more.
1) Open the Settings app on your iPhone or iPod touch with iOS 13+ or iPad with iPadOS.
2) Tap General in the list.
3) Tap Fonts.
You can now see all the custom fonts from across all font provider apps that you’ve installed on this device. Tap a font to view copyright information, the app it came from, file size, etc.
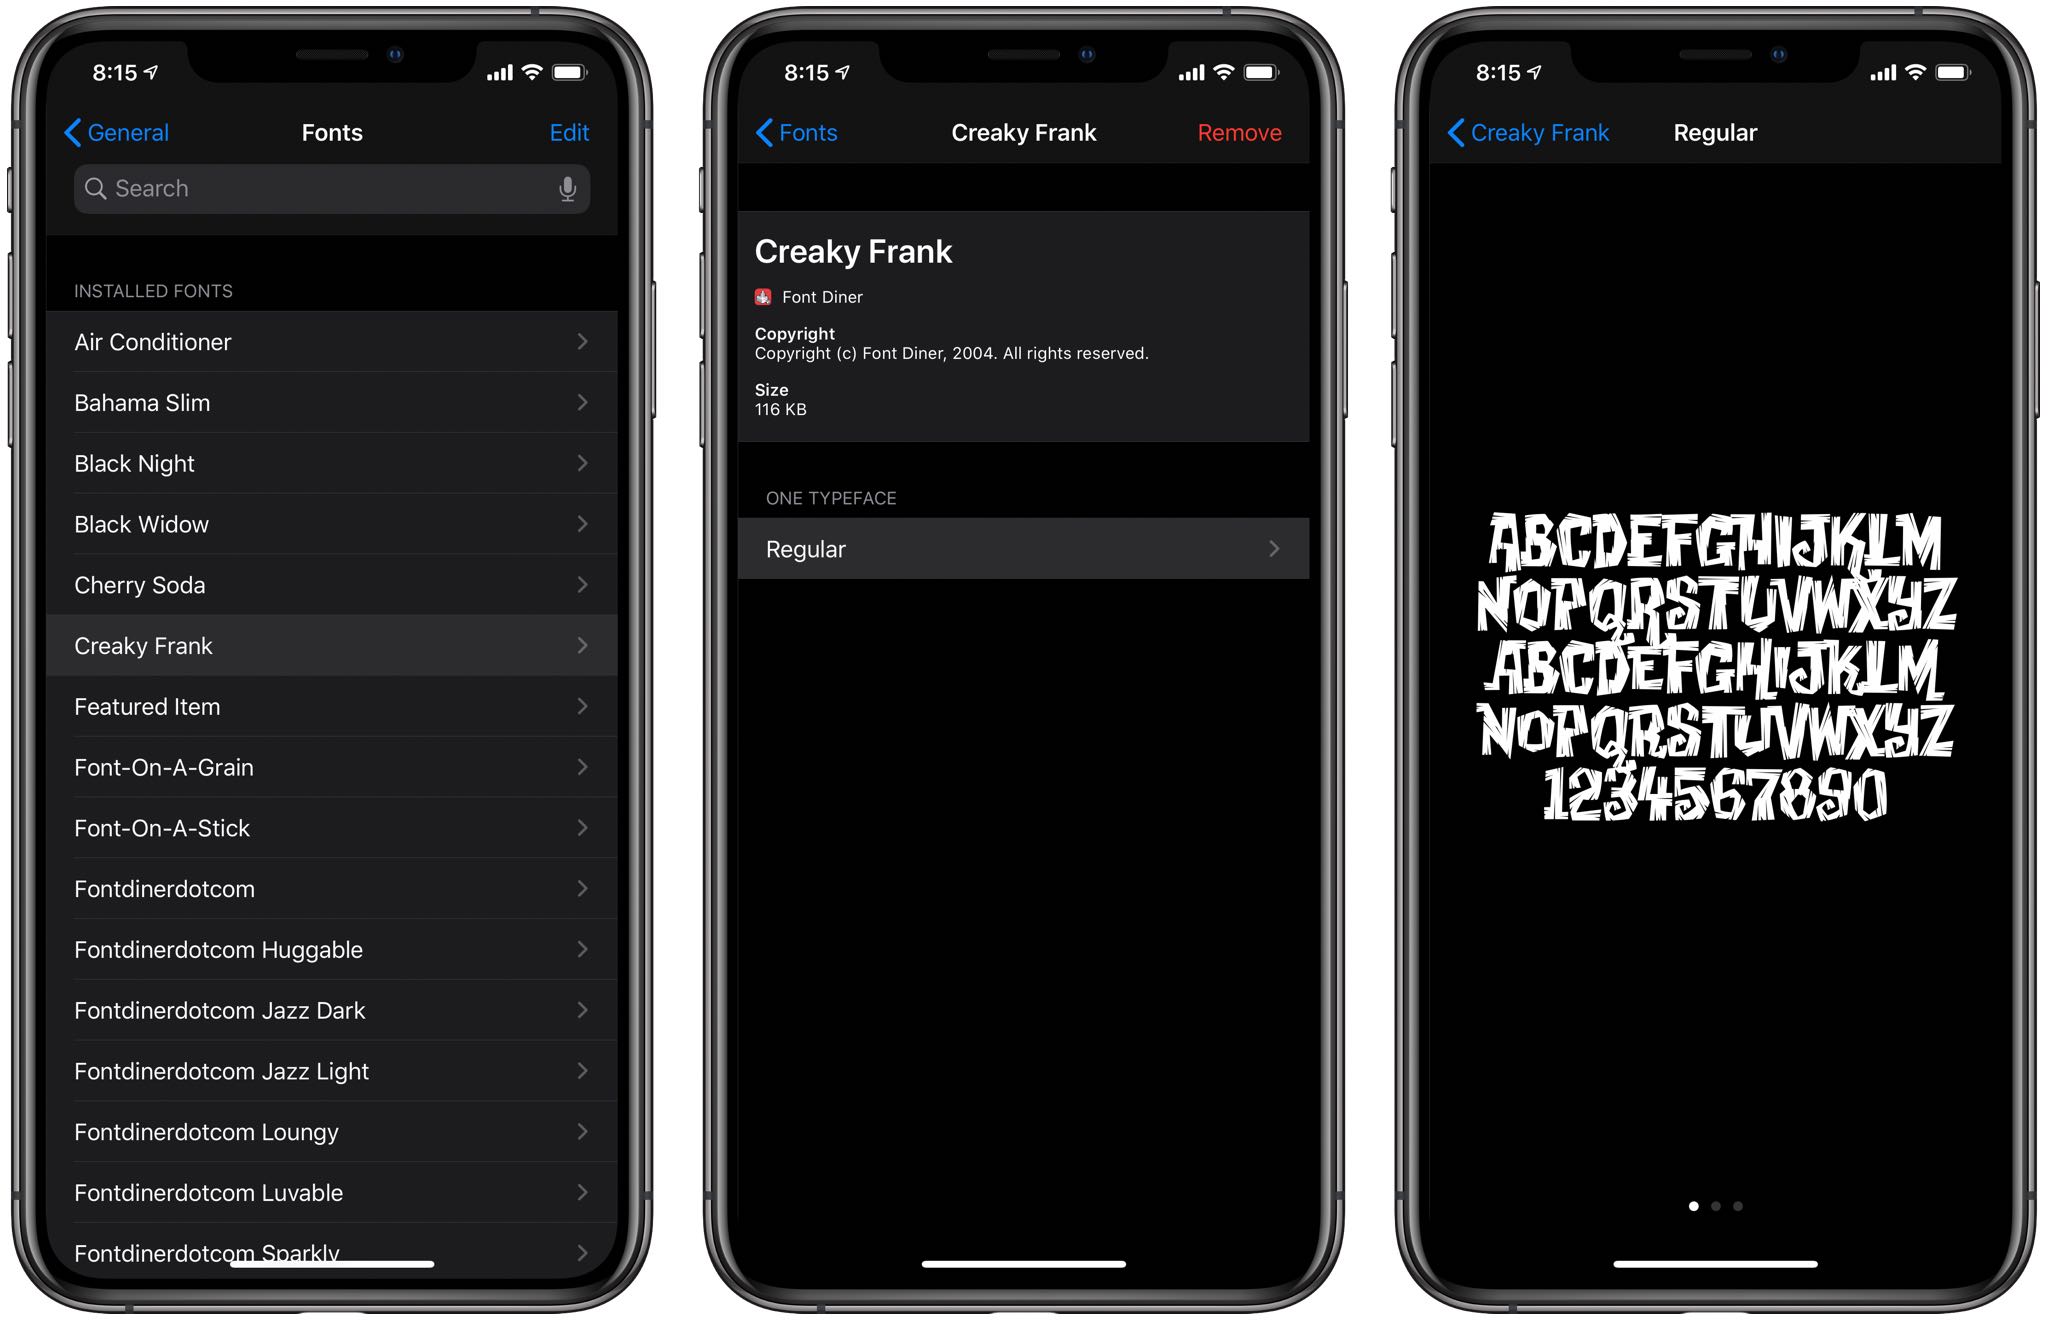
Swipe to the left for a nice preview of the selected custom font in a WYSIWYG manner complete with standard Lorem Ipsum sample text. You can also easily browse all of the font’s included typefaces.
How to delete custom fonts
Custom fonts are auto-removed when their container app is deleted from your iPhone or iPad. You can also remove any installed fonts that you no longer need manually to save disk space.
1) Open the Settings app on your iPhone or iPod touch with iOS 13+ or iPad with iPadOS.
2) Tap General in the list.
3) Tap Fonts.
4) Simply swipe left on a font in the list, then tap Delete to remove it from the device.
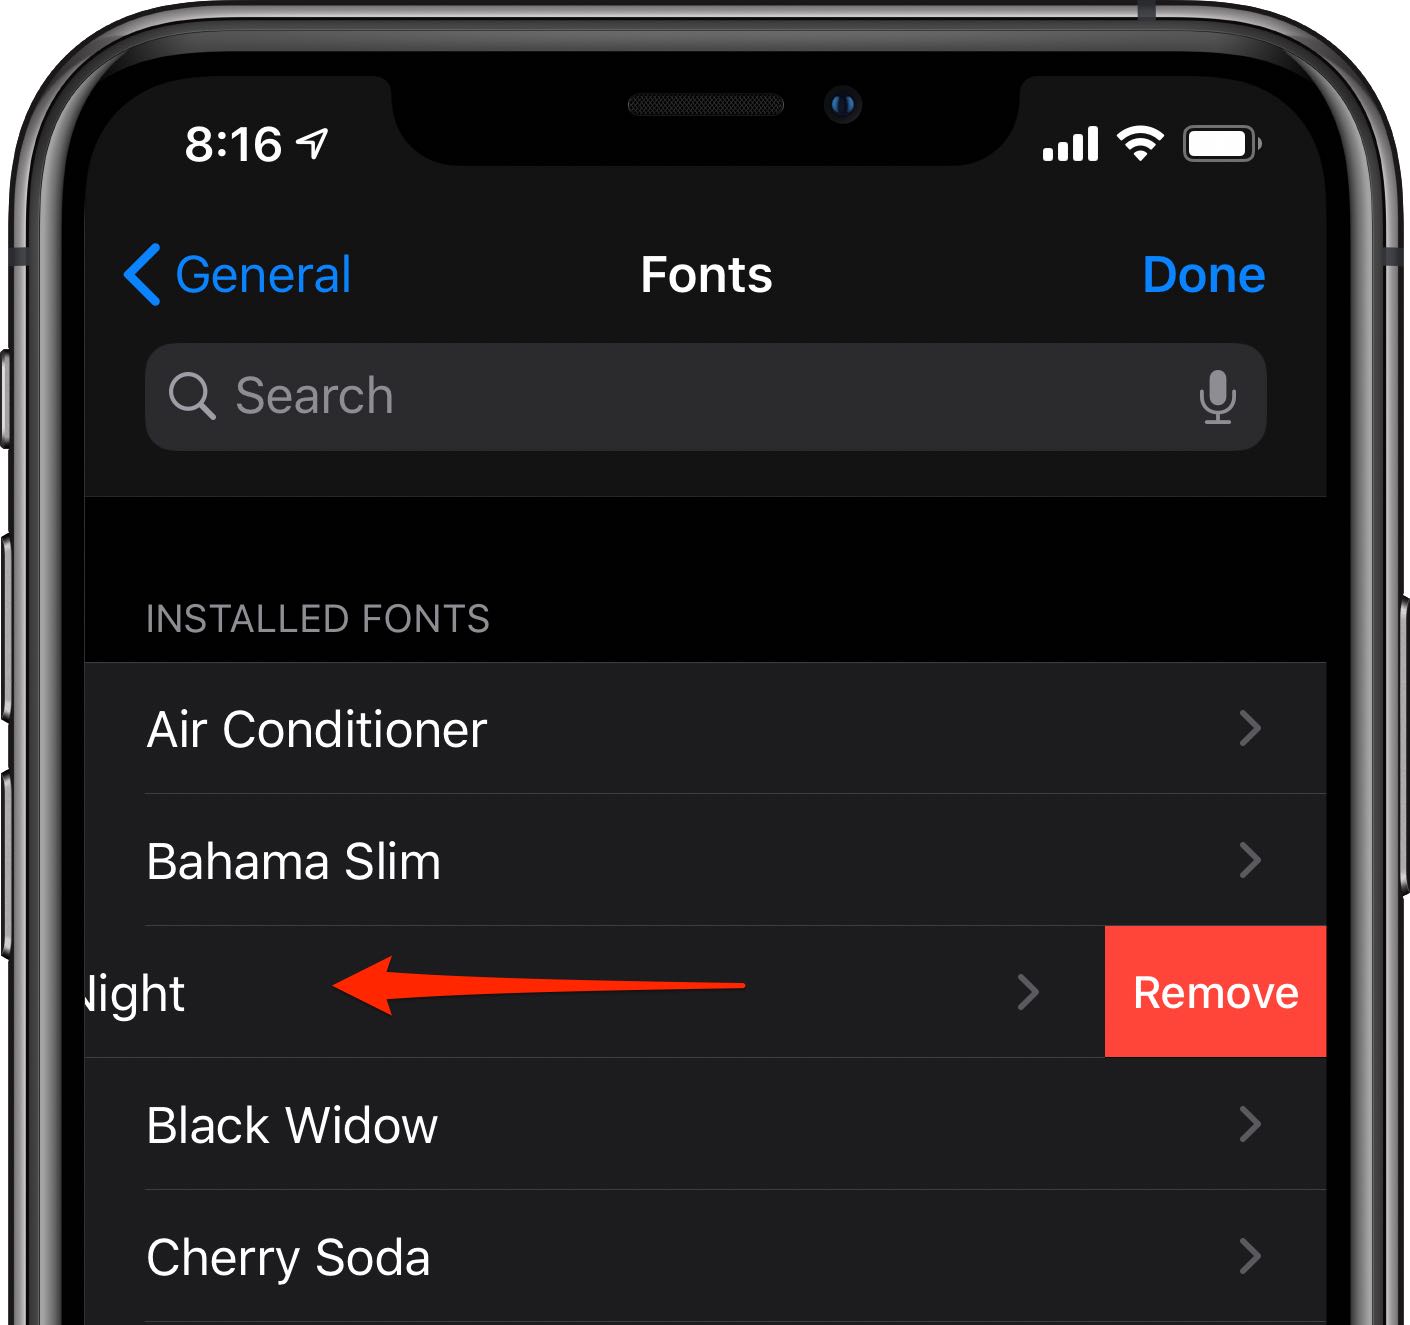
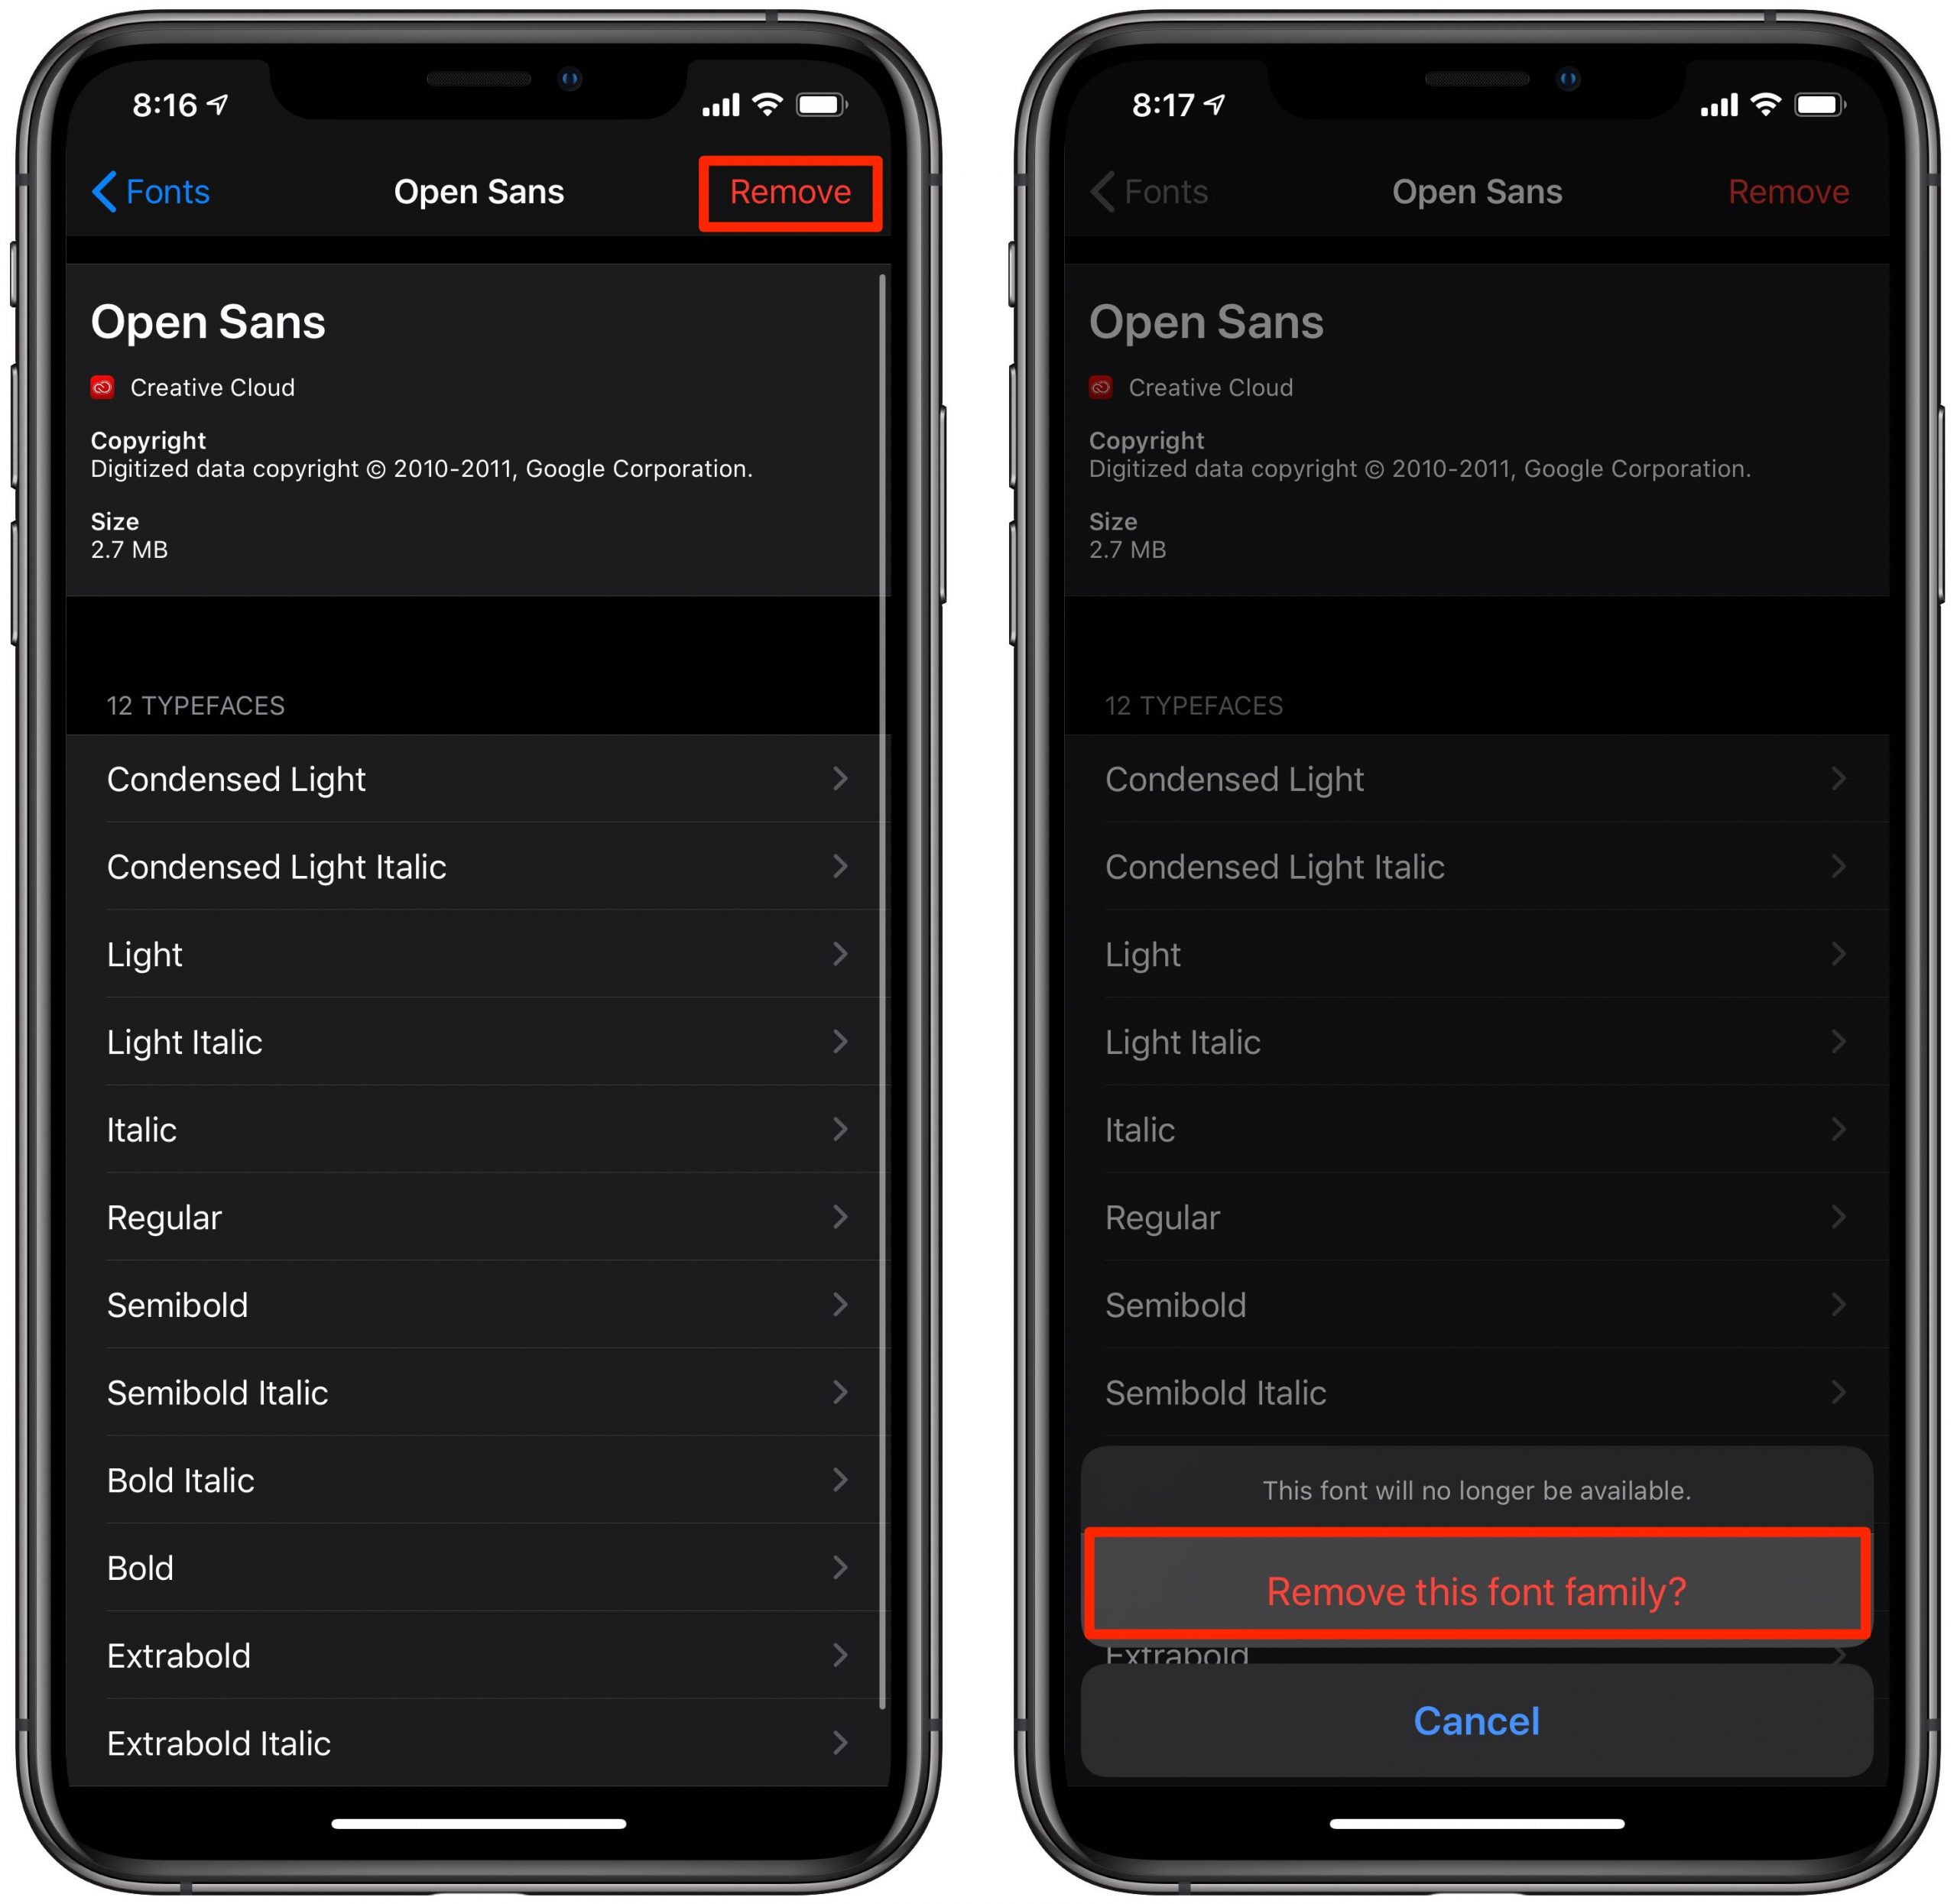
If you’d like to clear out multiple custom fonts at once, tap the Edit button instead, it’s in the top-right corner, then select the entires you’d like to delete and tap the option Remove. Lastly, confirm the operation to remove the selected font family.

As previously mentioned folks who prefer to download custom fonts by taking advantage of the configuration profile method can see what fonts they have installed by venturing to Settings → General → Profiles.
You’ll see one configuration profile for each font package installed on the device. Simply tap the profile to see what’s inside. To delete all fonts that were installed via the configuration profile, tap Remove Profile at the bottom. Now enter your device passcode and confirm that you’d like to completely remove the selected profile from your device by tapping Remove.
How to use custom fonts in compatible apps
Not all apps that let you work with fonts allow you to actually use custom fonts.
As an example, even though the Notes app or Safari’s Reader View include a font-selection option, you only get to choose between a few pre-installed fonts. Remember that custom font support requires a developer to implement Apple’s API in order to enable the system’s font selector.

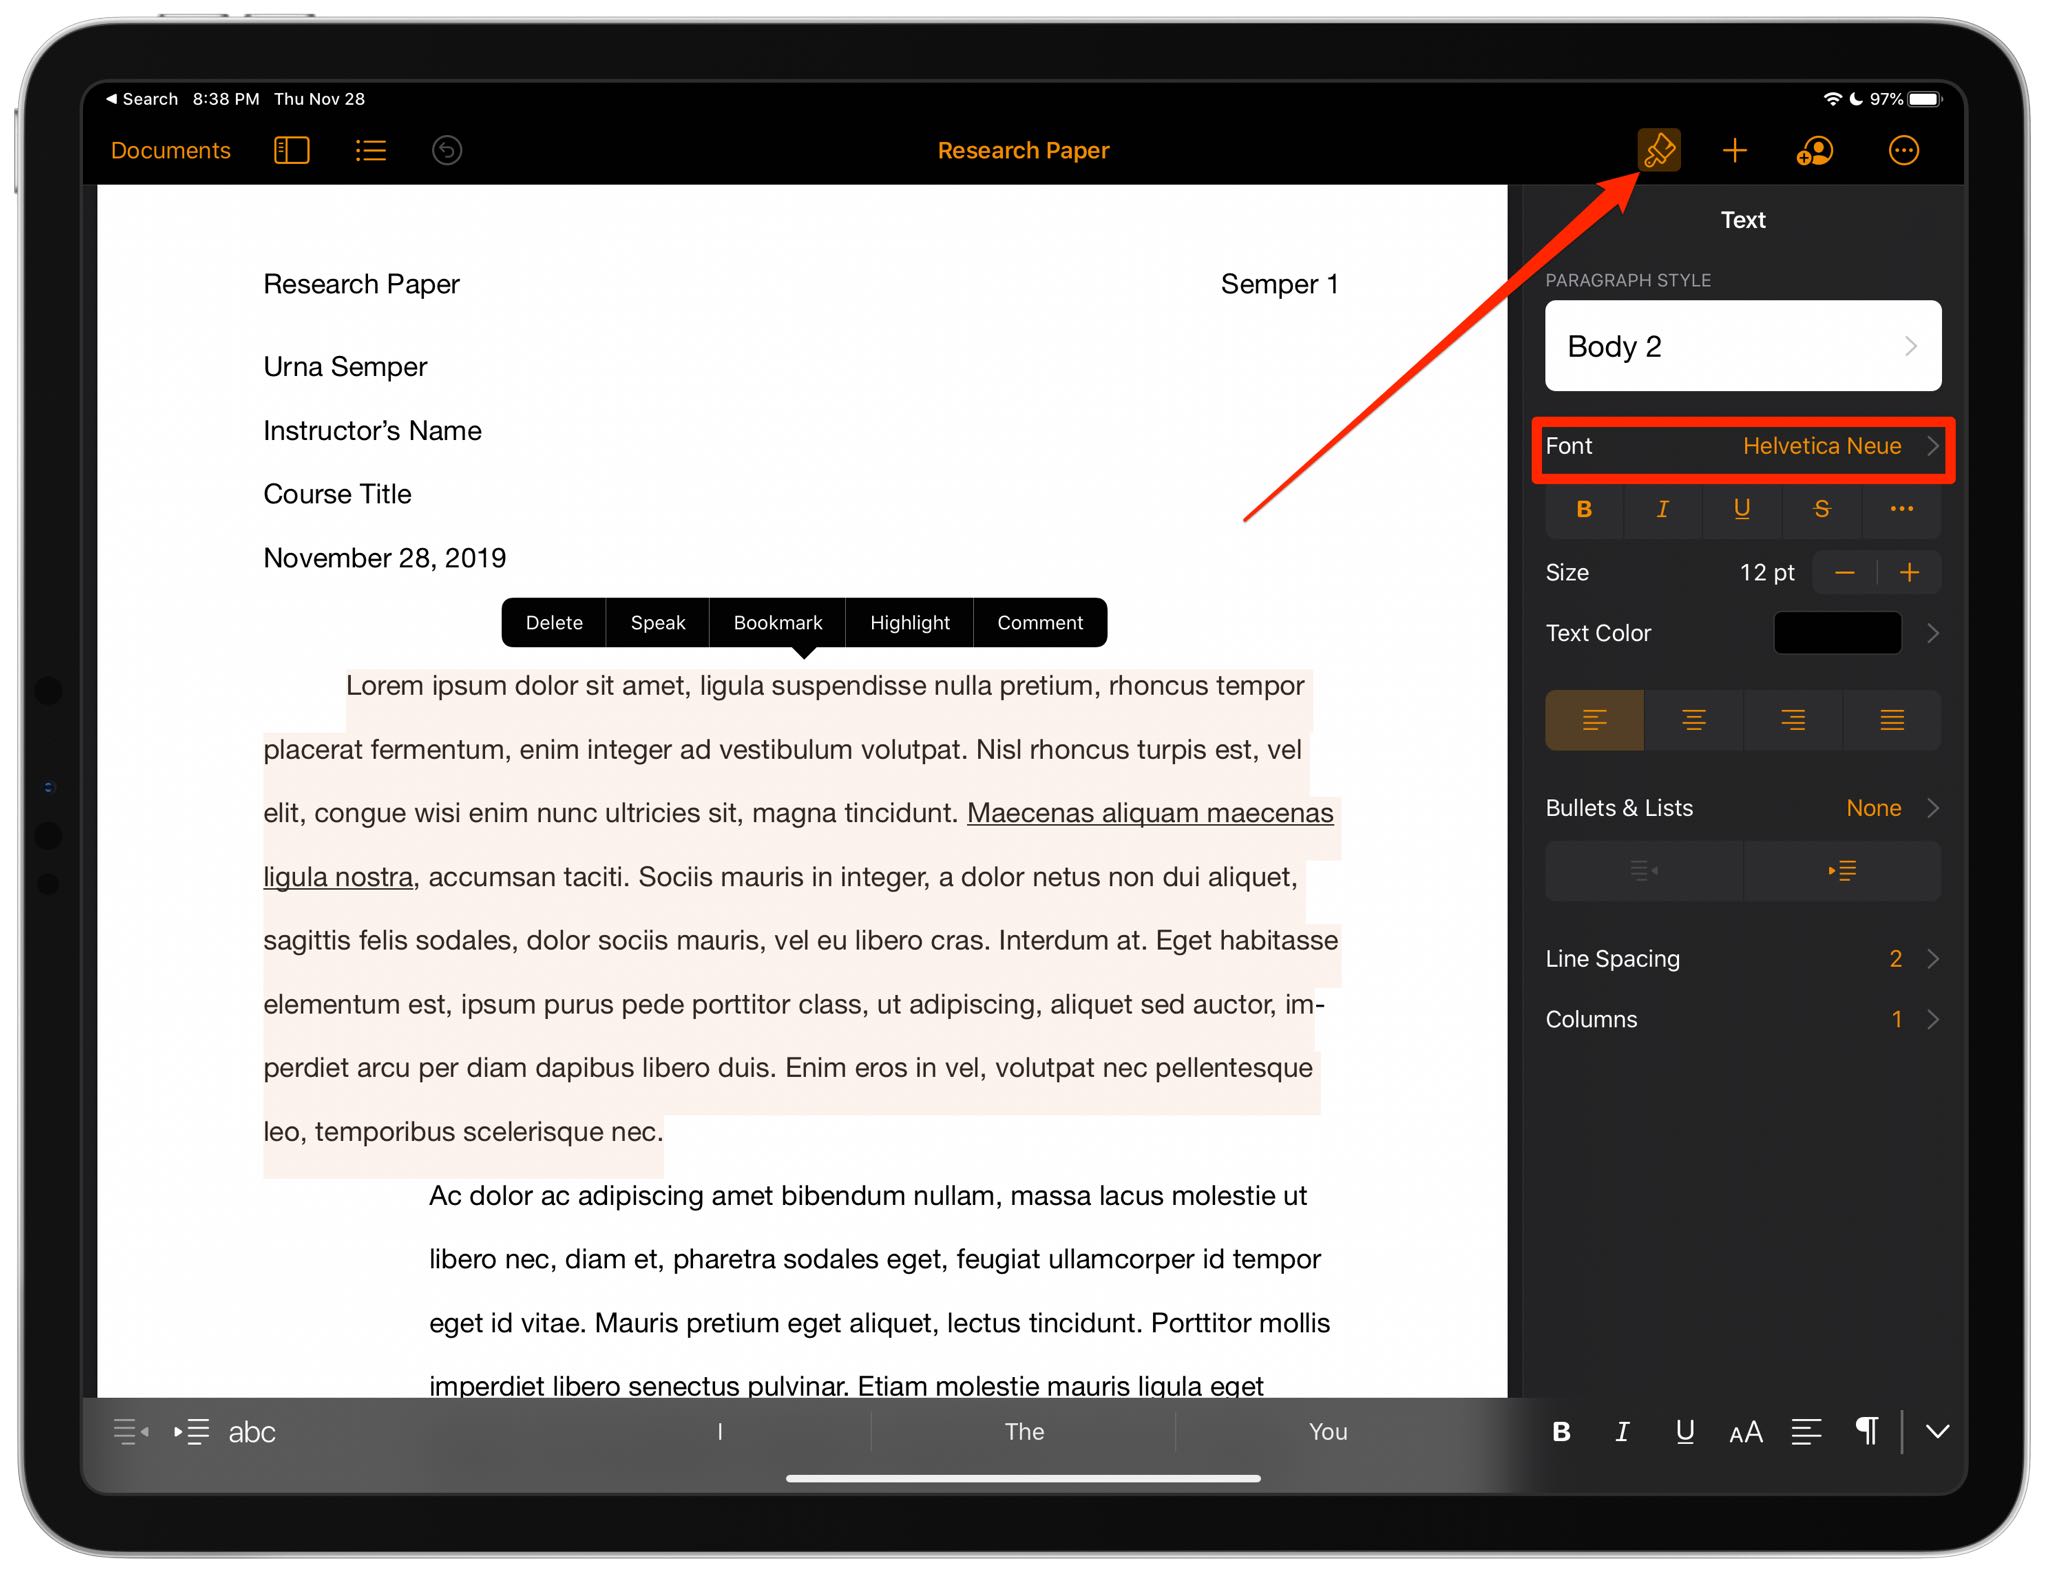
Tap the brush icon in the iWork apps to access fonts.
1) Launch an app on your iOS device that supports custom fonts like Mail or an app from Apple’s iWork productivity suite, such as Pages, Keynote or Numbers.
2) Now open a document in the compatible app that you wish to enrich with fonts, then select a text item such as a paragraph, title, image caption or some such.
3) Finally, invoke iOS’s fonts manager:
- Mail: Tap an angle bracket located at the rightmost side of the keyboard. Next, swipe the bar above the keyboard to the left until you see an icon labeled with the text “Aa”, then tap it to access the formatting options. Now tap the setting for Default Font to bring up the fonts manager where you can choose from a variety of system-wide fonts, like Times New Roman, Arial, Courier, Georgia, Helvetica Neue, Verdana and Marker Felt. Custom fonts downloaded from App Store will show up there as well.
- iWork: In Pages, Numbers or Keynote, tap the brush icon in the navigation bar near the top-right corner, then hit the currently selected font in the formatting menu to bring the list of the available fonts. Select a desired font from the list to use it.
Don’t see your installed fonts? That’s because your favorite app lacks support for custom fonts.

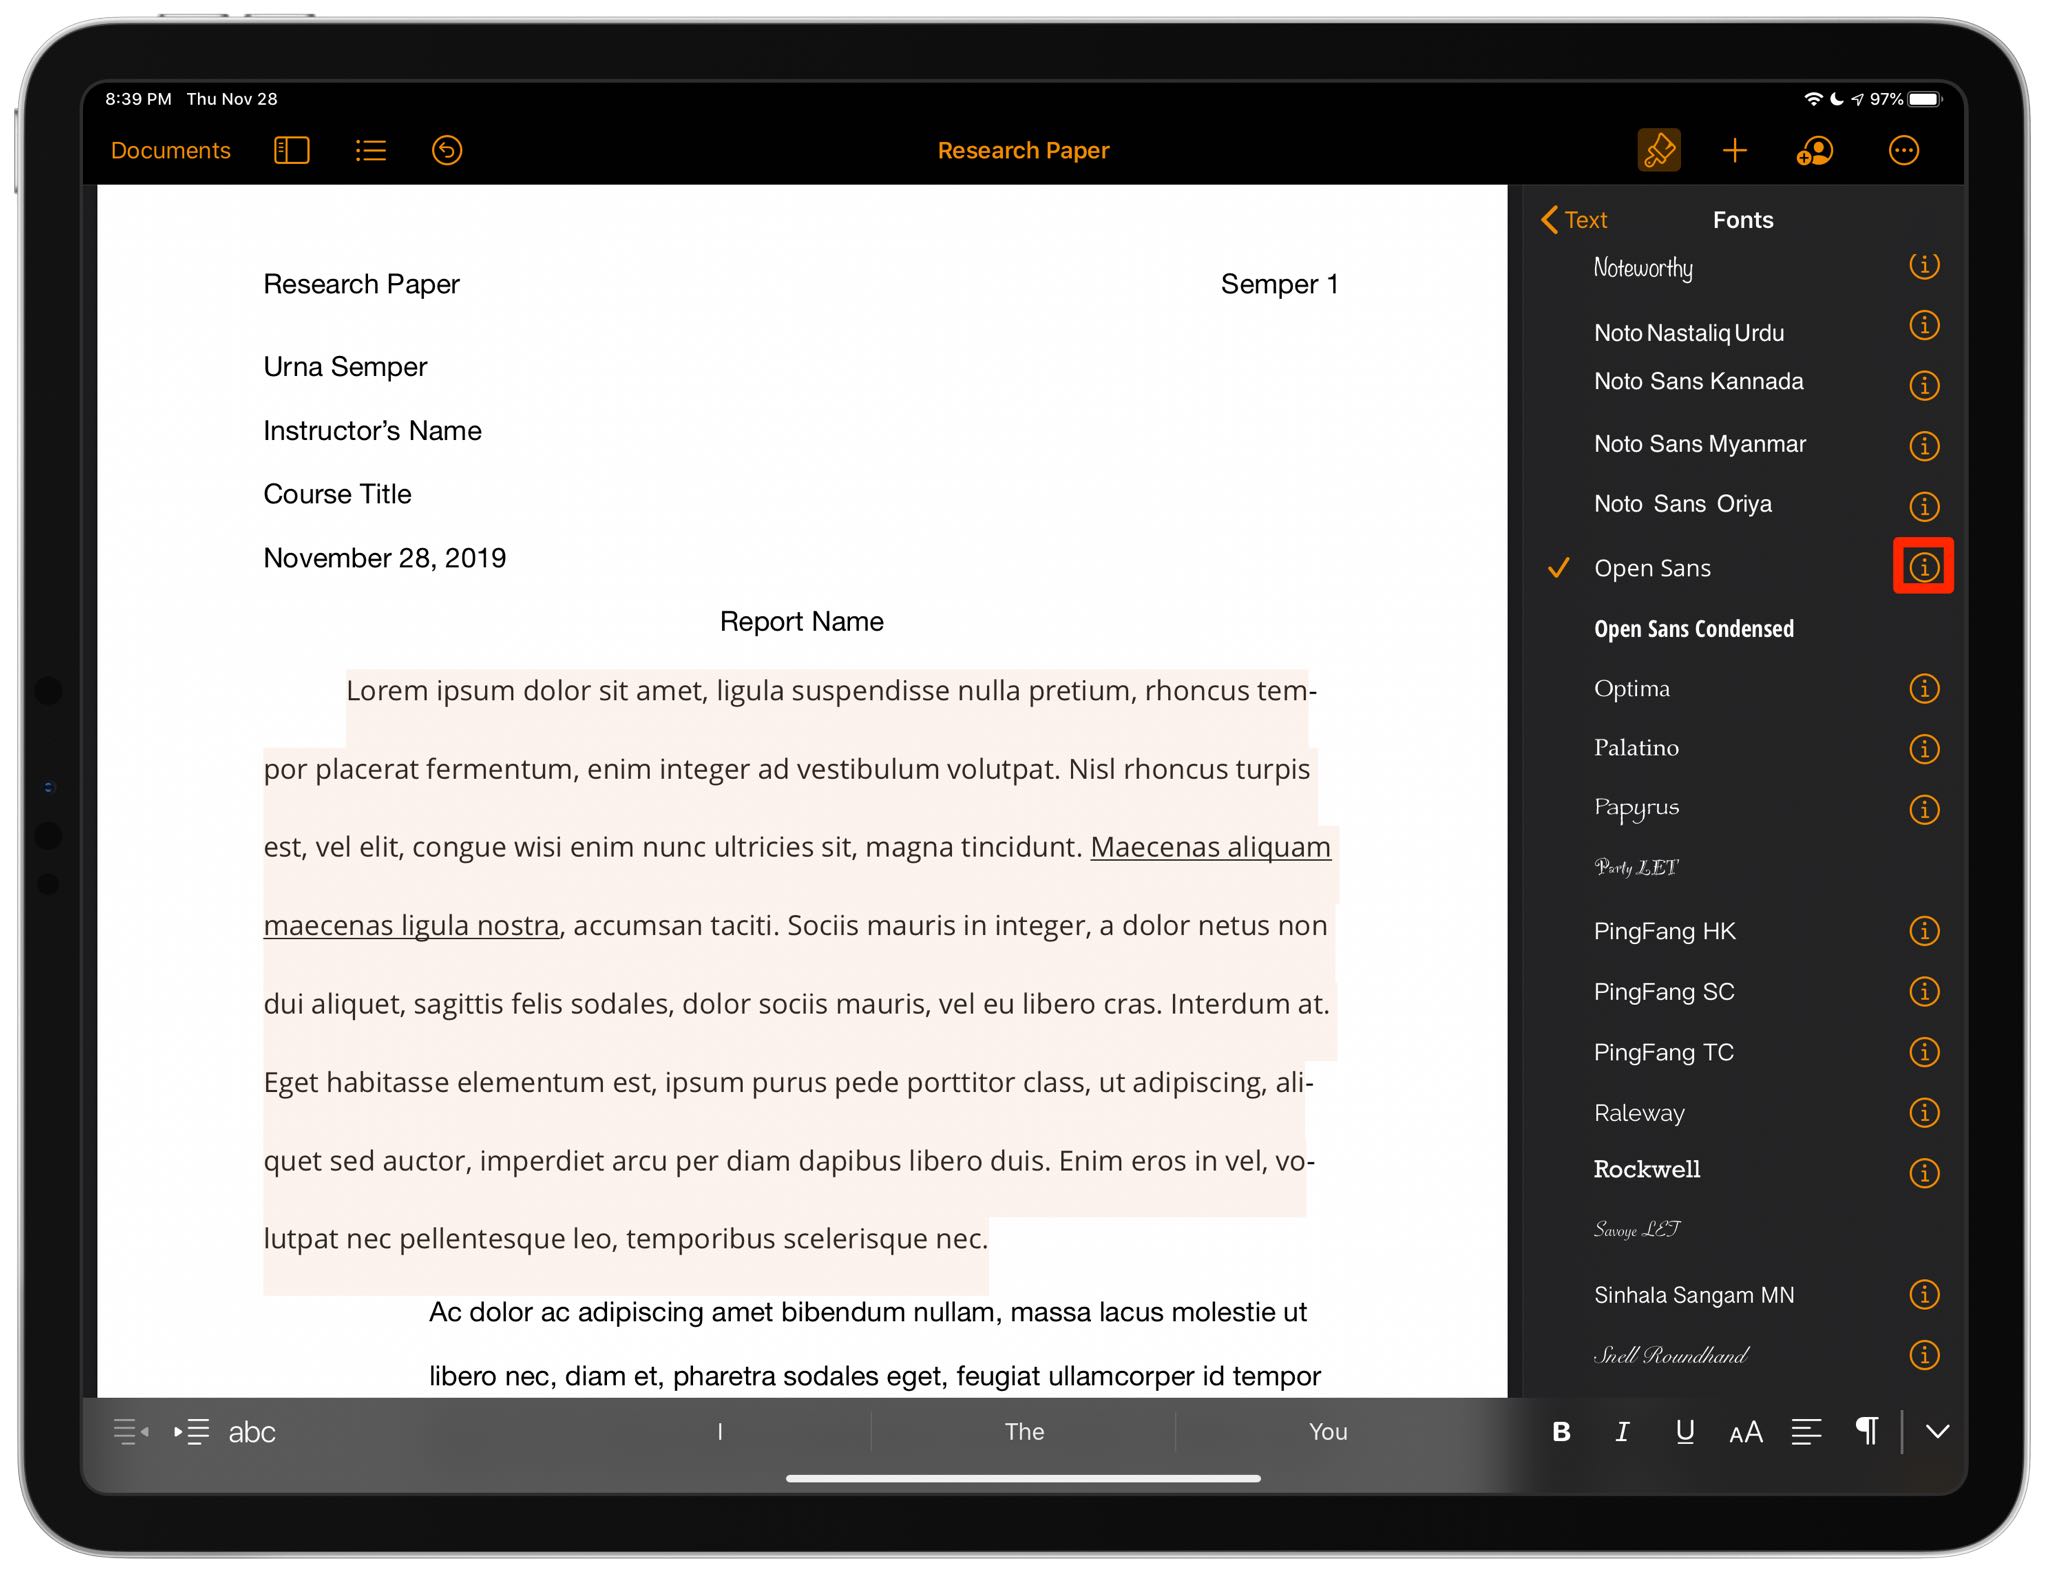
Tap “i” to access a font’s typefaces.
Unfortunately, the font selector does not make a clear distinction between the first-party system fonts and custom fonts from third parties, they simply all show up on the list.

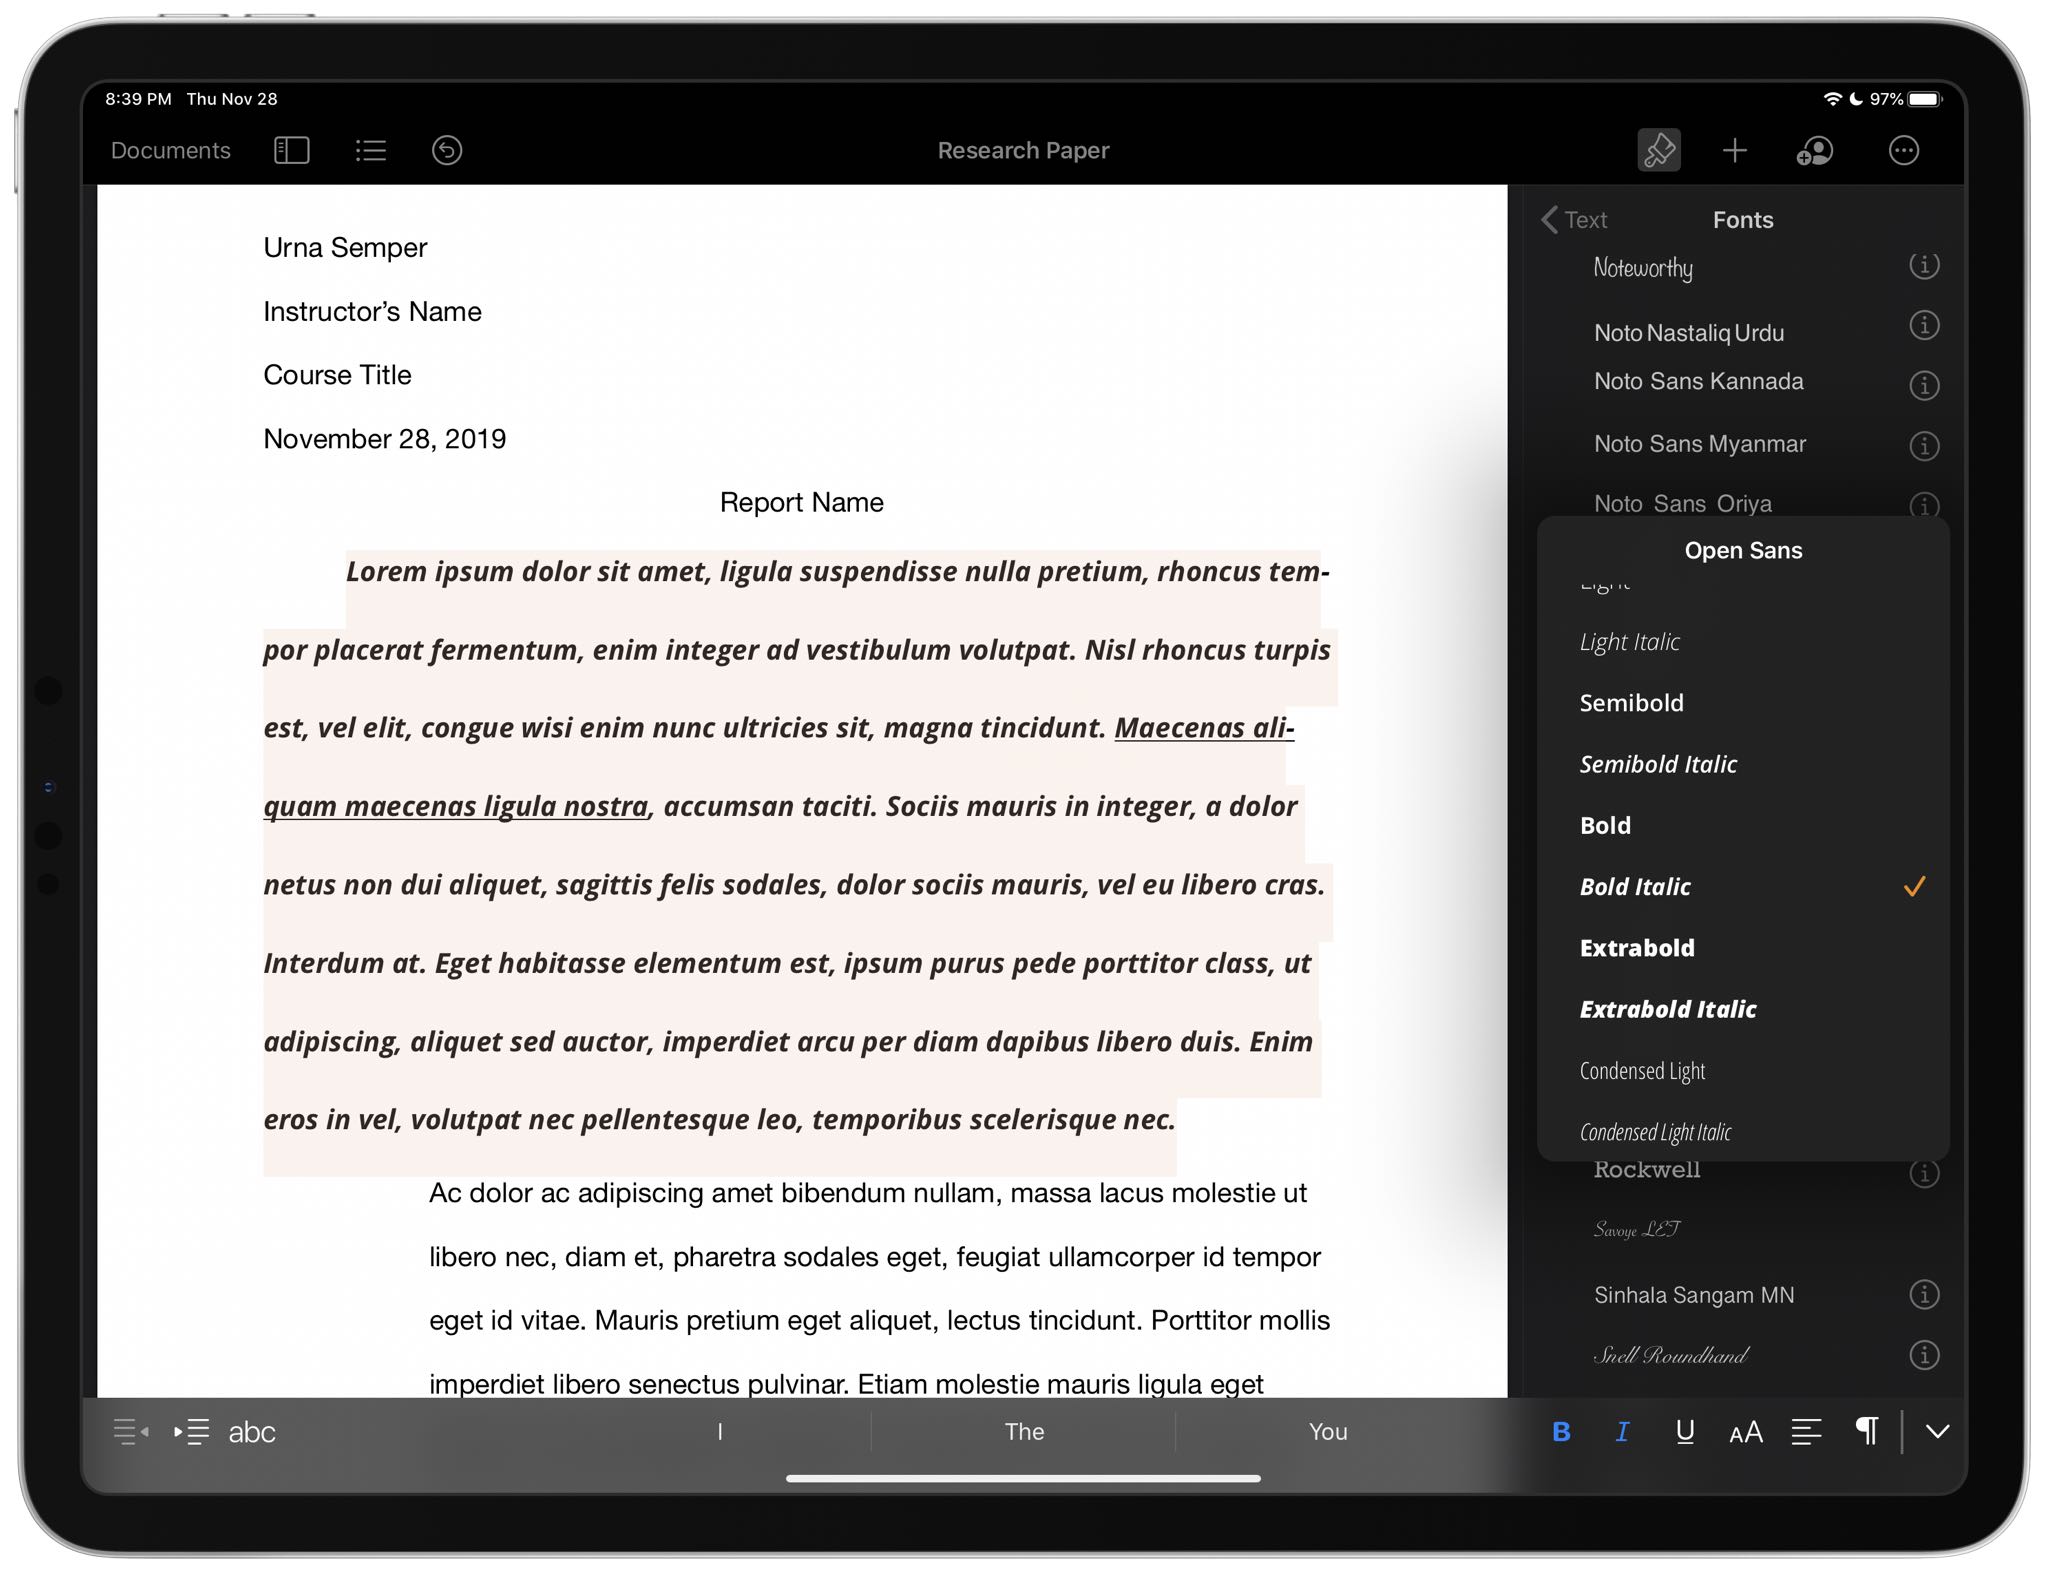
Fonts give every project a distinct personality.
If you’ve installed one or more fonts using the configuration profile method for use in incompatible apps like WhatsApp or Instagram, you will need a keyboard app like Fonts. It’s important to underscore that such apps don’t really provide true vector fonts but rather specific enclosed alphanumerics which appear as an entirely different set of fonts.

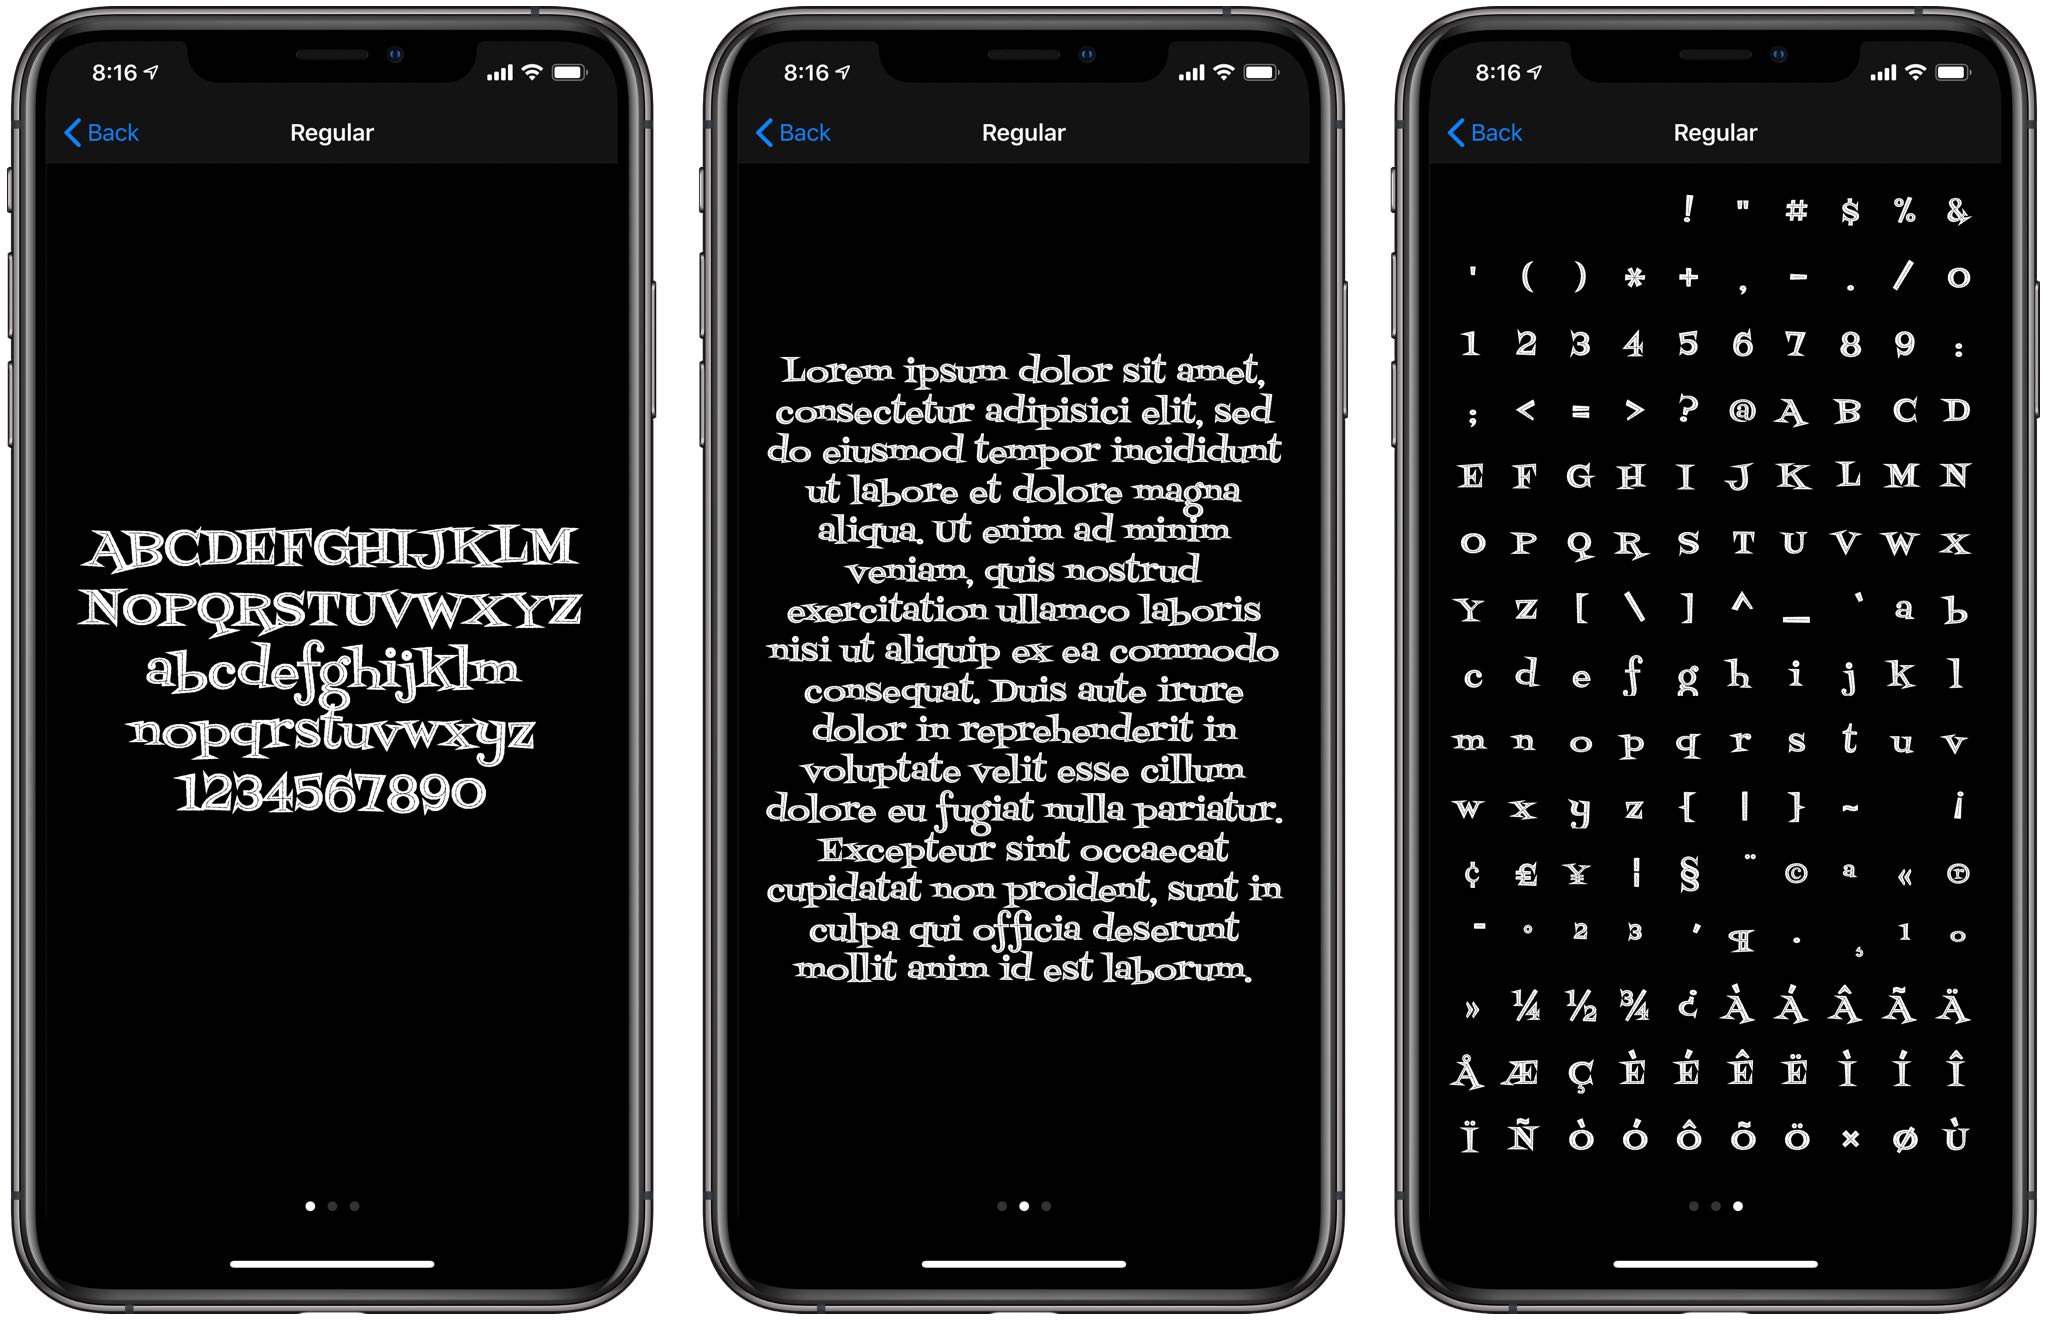
iOS 13 lets you deck up your device with custom fonts for use in compatible apps.
With Fonts installed, hit that Globe icon on the stock keyboard and choose the Fonts keyboard. Now you can impress your friends by livening up your conversation with funny fonts in chat.
Need help? Ask iDB!
If you like this tutorial, pass it along to your friends and leave a comment below.
Got stuck? Not sure how to do certain things on your Apple device? Let us know via help@idownloadblog.com and a future tutorial might provide a solution.
You can also submit your own how-to suggestions via tips@idownloadblog.com.
Some screenshots courtesy Typography.com